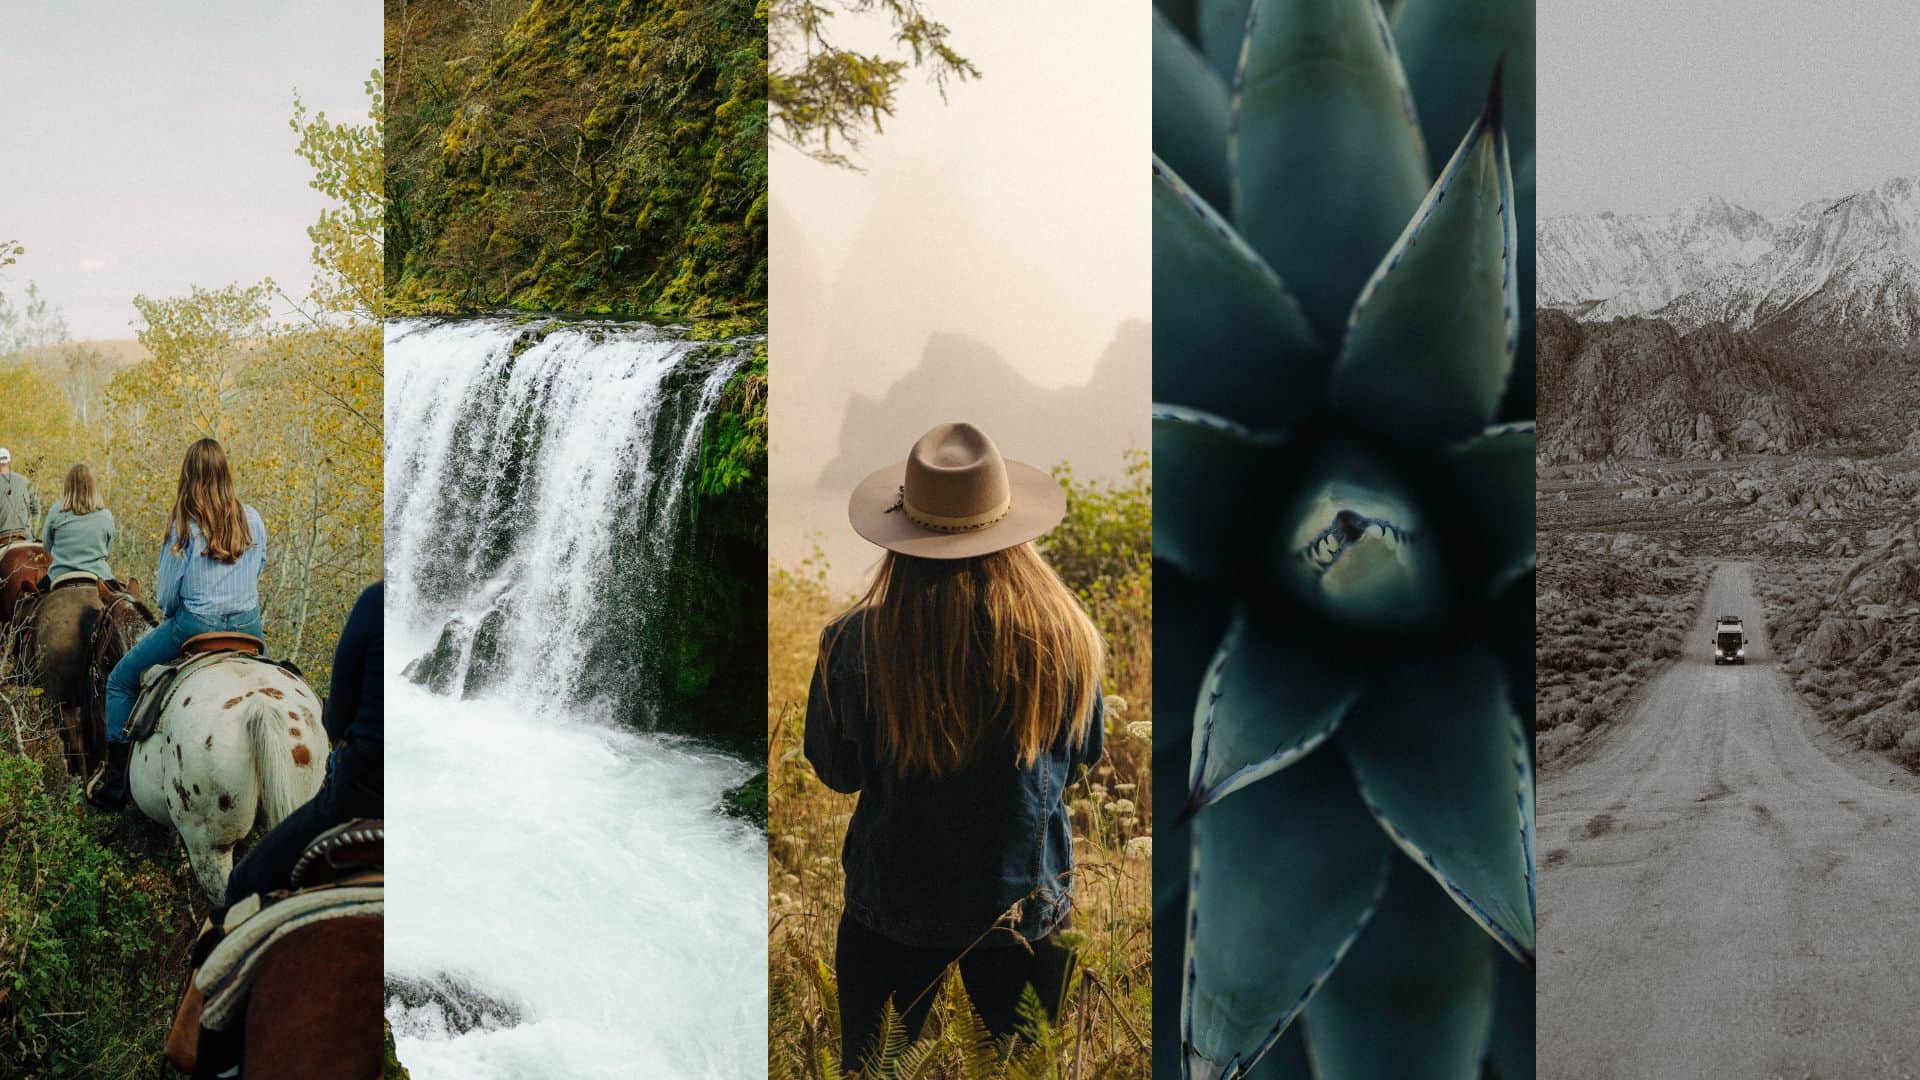
Hi friend! You’re probably here because you purchased The Mandagies Essential Presets! This blog post will give you some tips on how to use these presets, starting points for editing, and ways to maximize your image investment!
How To Download The Mandagies Essential Presets
To download the presets, we highly recommend first downloading them onto your desktop computer.
This will ensure they are stored in a safe place that you can come back to them time and time again.
Once they are safely on a desktop, THEN you can transfer them to your mobile device!
Download On Lightroom Desktop App
1.) Once you’ve purchased the preset pack, UNZIP the files
2.) It should show as a folder with 5 XMP files after the file is unzipped
3.) OPEN Lightroom Desktop (NOT the Lightroom Classic App)
4.) Select a photo to edit
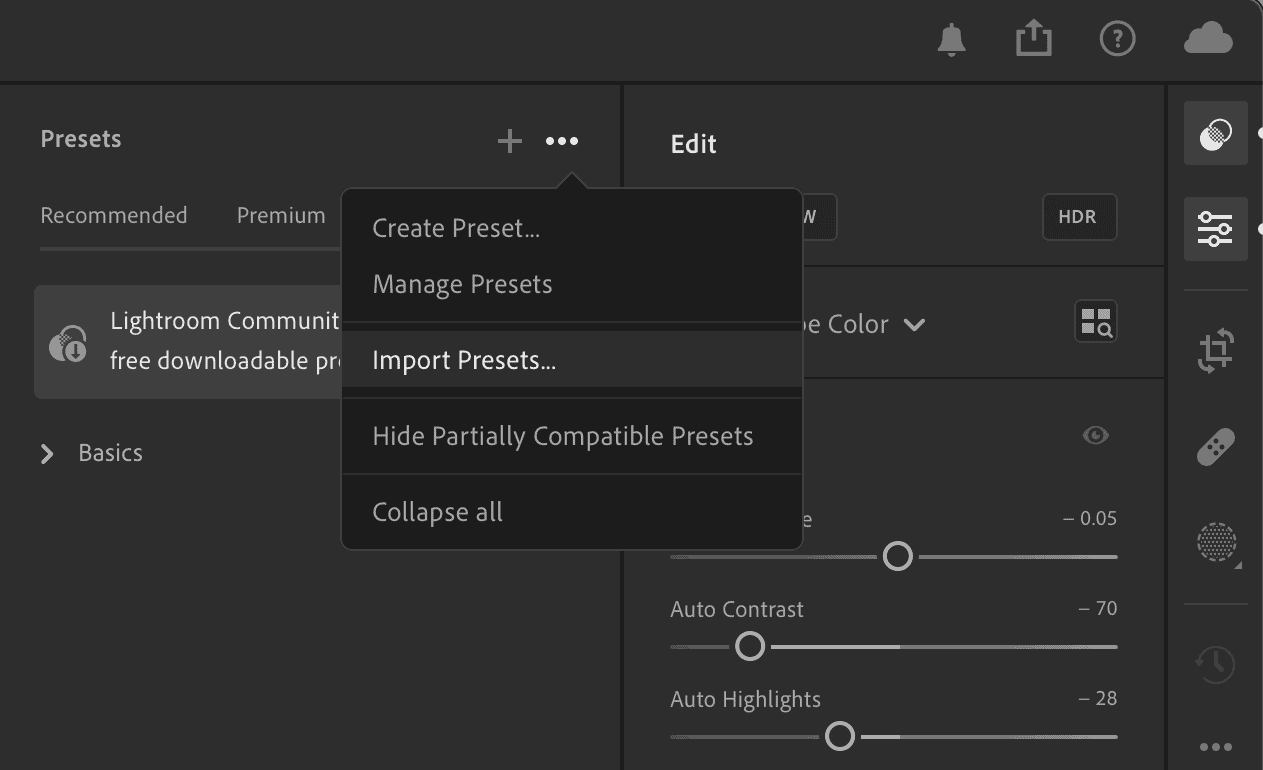
5.) On the top right of the app, click the PRESET button, which the logo should look like as two circles merging.

6.) Click the THREE DOTS on the top right of the PRESET tab. Then select “Import Presets…”
7.) Highlight all of the XMP files from the UNZIPPED folder, click IMPORT.

8.) And, voila! All of The Mandagies Essential Base Presets are ready to go in your Lightroom Desktop App.
Download On Lightroom Mobile App
If you scrolled to this section straight away, please refer to the Desktop instructions first! You’ll need to download them on your computer before moving onto this step.
Once you do all of the steps above in the Lightroom Desktop App (Adobe Lightroom NOT Lightroom Classic), your presets in the Lightroom Desktop App should automatically be uploaded in the Lightroom Mobile App.
If it doesn’t sync, try swiping up on the app to reset and try again.
To use your downloaded presets:
1.) OPEN Lightroom on your mobile device
2.) Select a photo to edit
3.) At the bottom left of the app, tap PRESETS (looks like two circles merging with one another)
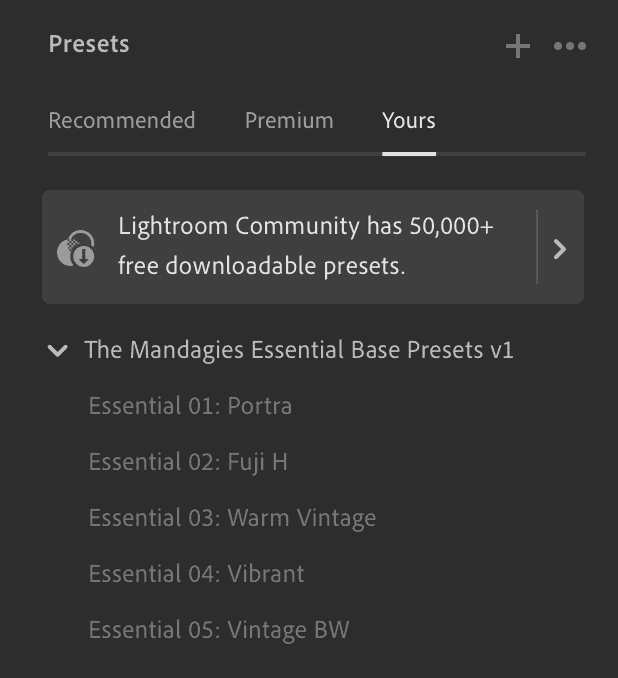
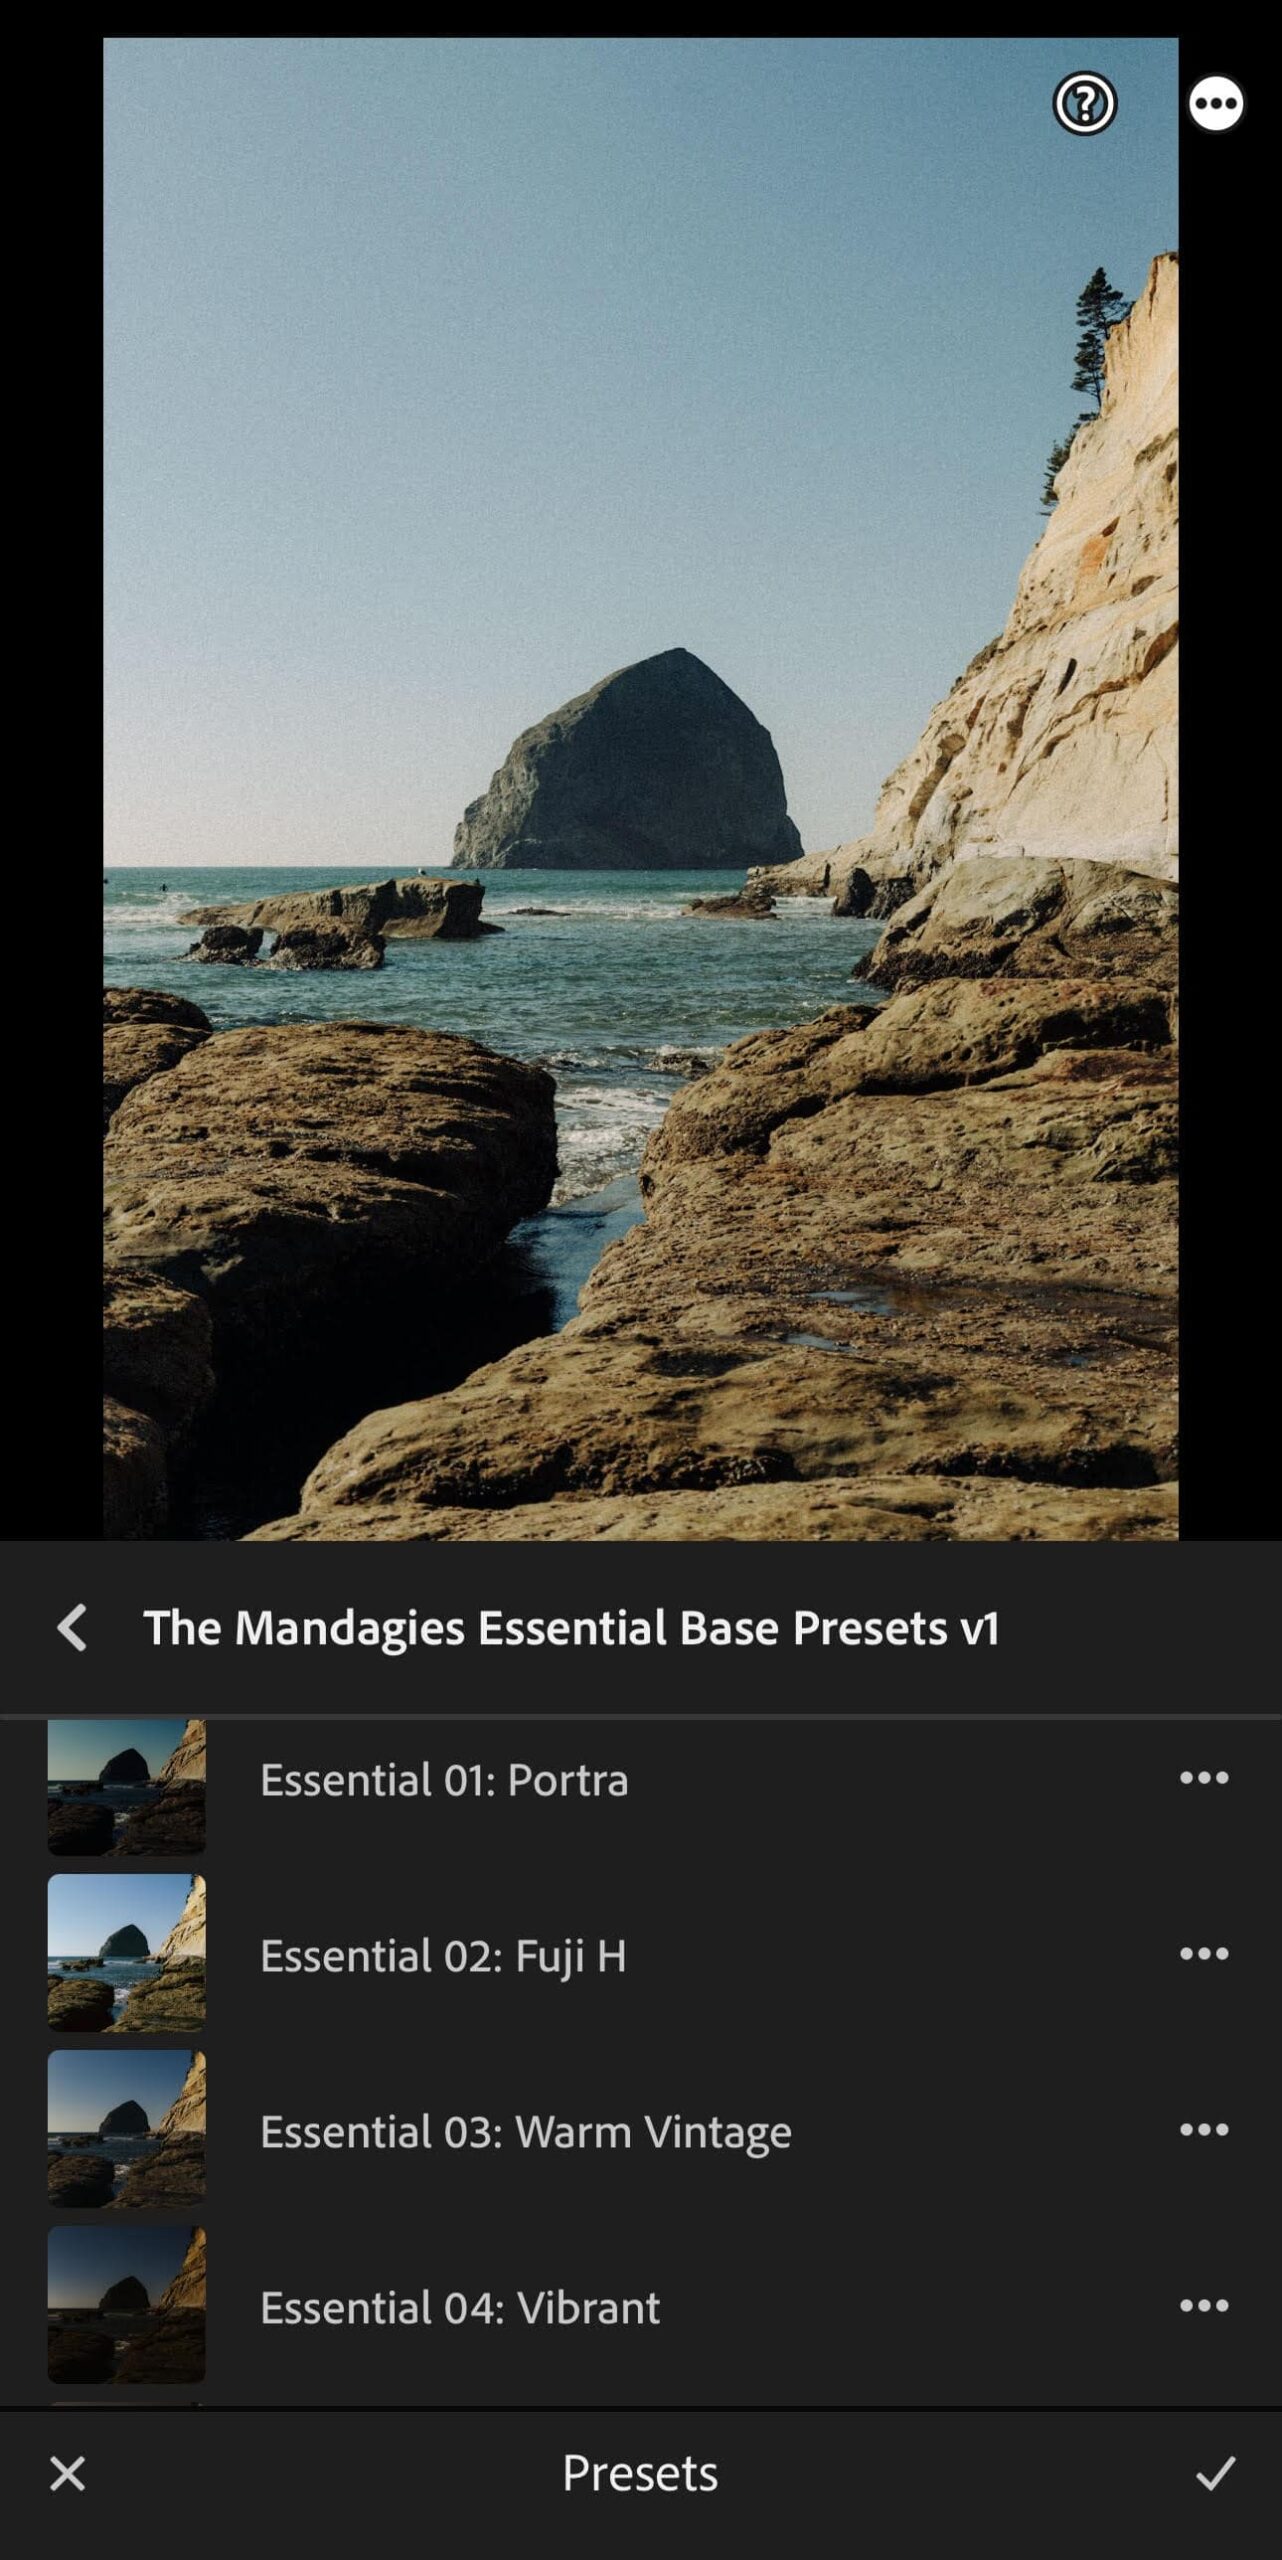
4.) Select “Yours”
5.) From here you can select the PRESETS that was imported from the Lightroom Desktop App
NOTE: You need an Adobe Creative Cloud membership to sync photos across all your devices. Premium features are only available to Adobe CC members.
If you need further assistance, please reach out to me on Instagram at @bertymandagie or send an email to themandagiespresets [at] gmail [dot] com.
How To Use The Mandagies Essential Presets
What is a base preset?
Before we dive into how to use The Mandagies Essential Presets, it’s important to understand that these presets are BASE presets. not one-click presets.
What’s the difference?
A base preset means will still have some adjusting to do before finishing your image.
Consider our presets a foundation for starting your editing journey. Each image is unique, so plan to spend some time tweaking and adjusting until you are happy with the outcome.
Tips For Editing Your Images
When it comes to these presets, we focus a ton on the color accuracy of each preset.
No two images are alike, and each one has a different contrast and different color tones. Therefore, it’s important to know that you’ll be tweaking these sliders the most:
- Exposure
- Temperature
- Tint
Photo Tip: A good rule of thumb is to treat regular sunny daylight images as 5500 Kelvin for your Temperature Slider. From there, you can decide whether you need to go warmer or colder based on your personal editing preferences.
The Mandagies Essential Presets: Dissecting the Details
Now, let’s dissect and go into the details of each preset.
We will also let you know what we believe each preset is meant to be used for.
As always, take these as suggestions – you know your images best, so ultimately do what you think it’s the right choice for your craft! So let’s dive in!
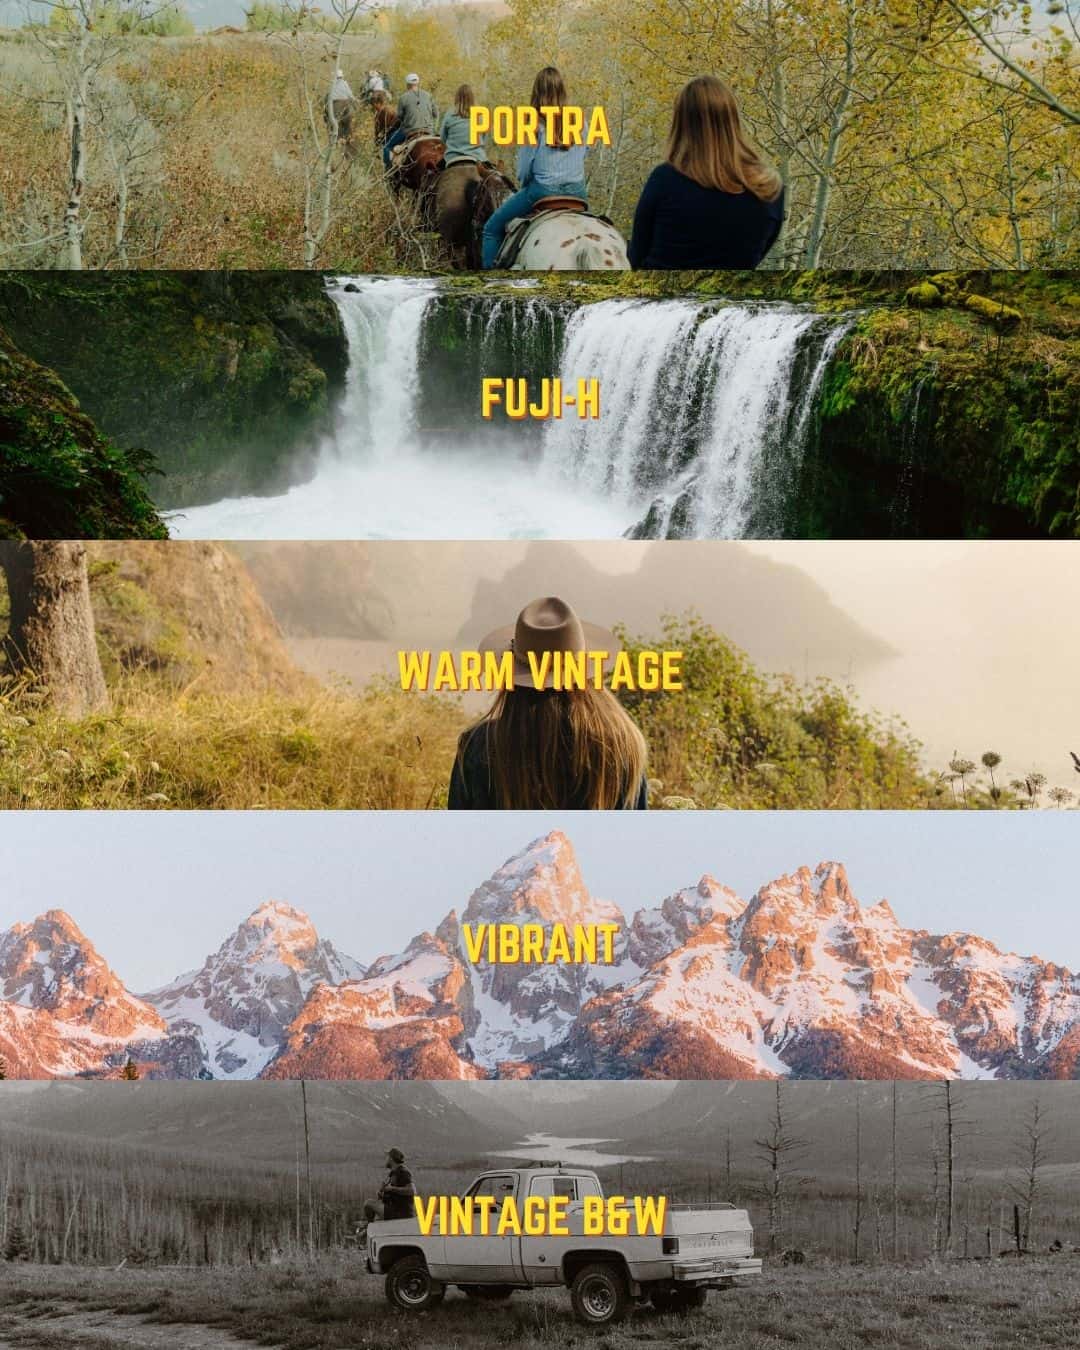
1.) Essential 01: Portra
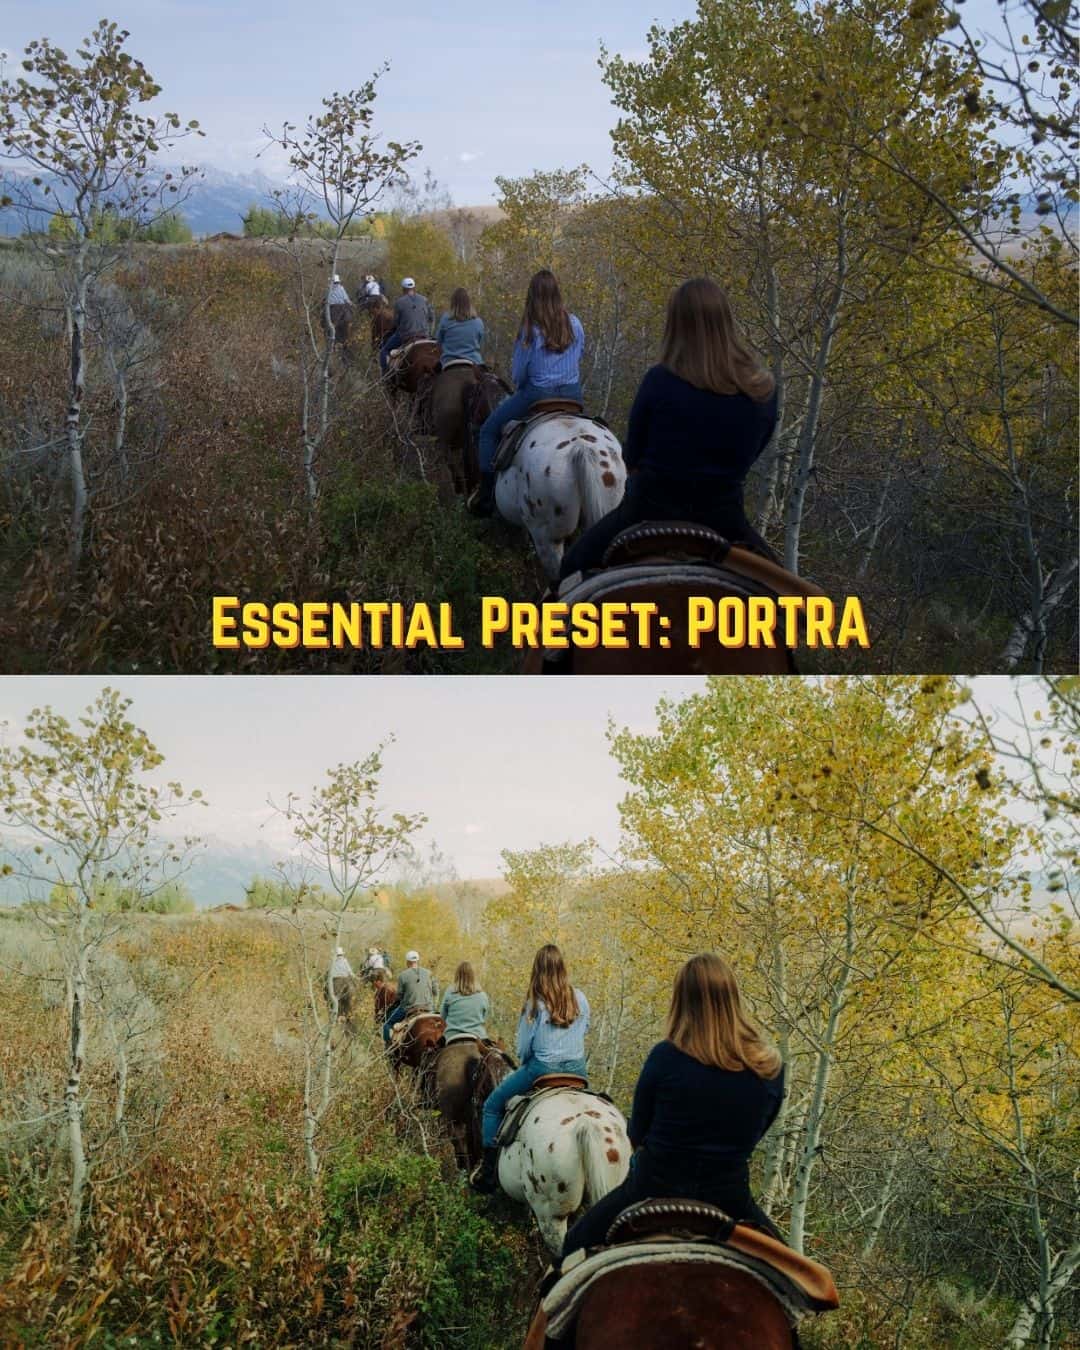
This base preset is inspired by Portra 160, 400, and 800.
To combine all three is an impossible task, but I feel like I did the best to my ability to mimic the look and feeling.
First, adjust the exposure to your liking.
Secondly, adjust the White Balance (Temperature and Tint) sliders.
Where To Apply: This is my most-used preset, personally. I love the warmth this gives while maintaining the greens and beautiful skin tones. This is great when used for a sunny day. Playing around with the Temperature sliders is the one I would recommend the most for this particular preset.
2.) Essential 02: Fuji-H

This base preset is inspired by Fuji 400H. With this preset, I focus a lot on making the greens much richer and the blues a lot more emphasized in the photo.
Growing up and living in the Pacific Northwest, this preset is a must-have in my arsenal.
To use this preset, first, adjust the exposure to your liking.
Secondly, adjust the white balance (mostly the Temperature) sliders.
You don’t want to mess around too much with the Tint on this because it is purposefully to have a green undertone within the shadows. However, you can always adjust the tint to your personal preference.
Where to Apply: This preset is great to use on rainy days, especially typical rainy hikes in the Pacific Northwest. The contrast of the green really pops with this particular preset.
3.) Essential 03: Warm Vintage
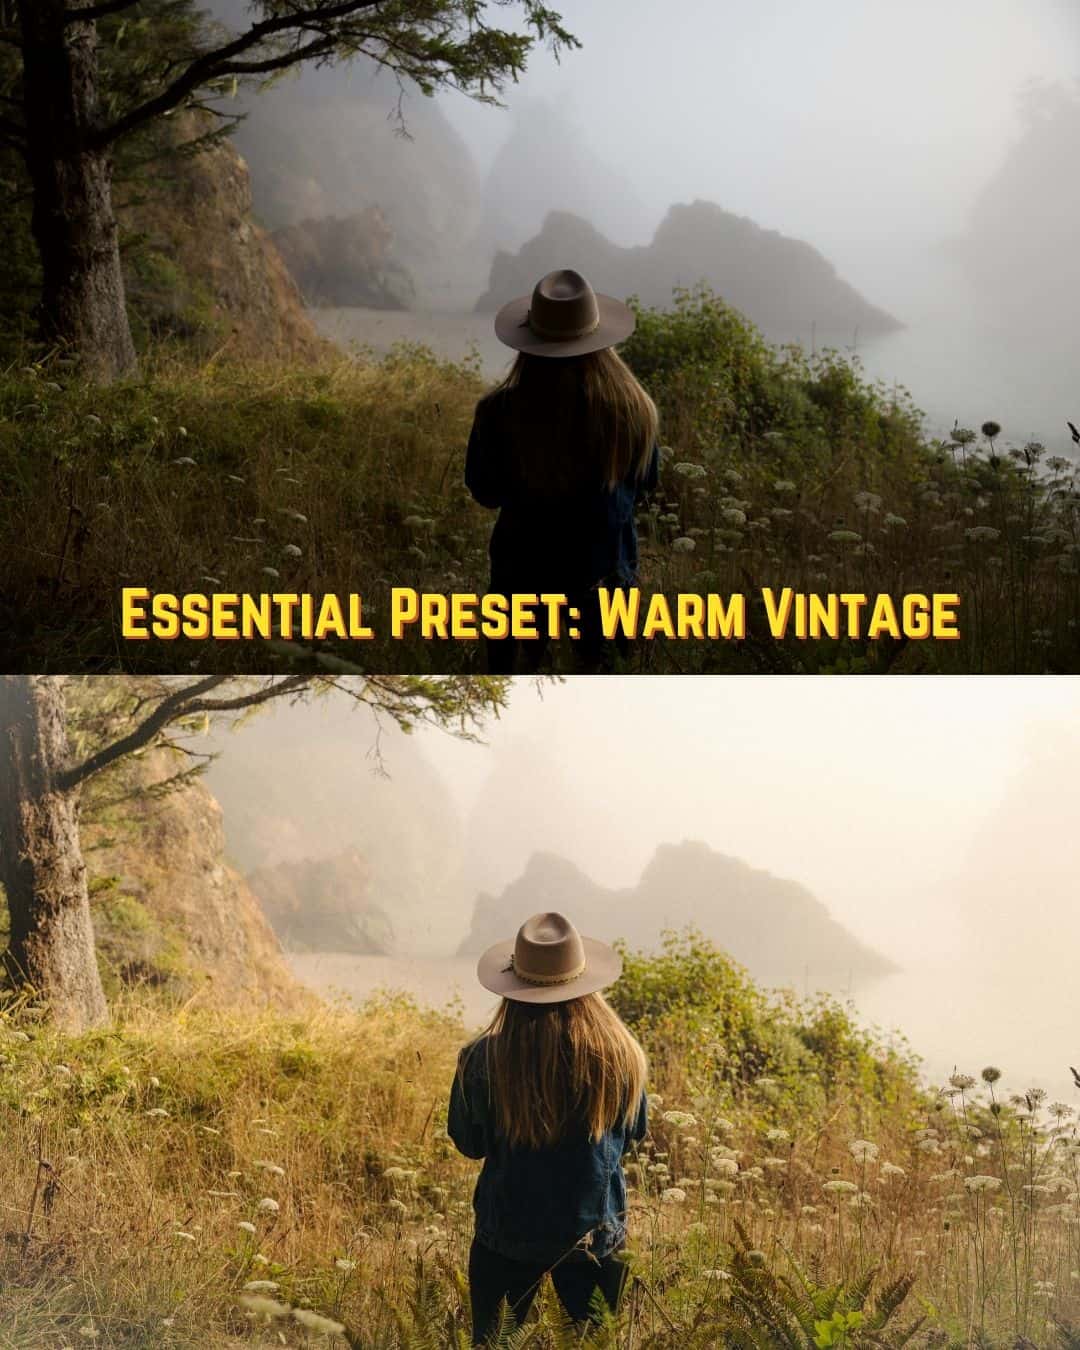
This base preset is inspired by a perfectly aged film photograph (minus the grain). With this preset, I focus a lot to give the image a warmer tone.
First, adjust the EXPOSURE to your liking.
Secondly, adjust the white balance, especially the Temperature slider. I might over compensate on the warmth in this one so slightly adjust it to your liking.
Remember the 5500 Kelvin rule (from above) and go from there. In this preset I want to highlight the warmth on skin tones.
I also made this preset really easy for editing harsh light to make a well-balanced warm vintage look.
4.) Essential 04: Vibrant
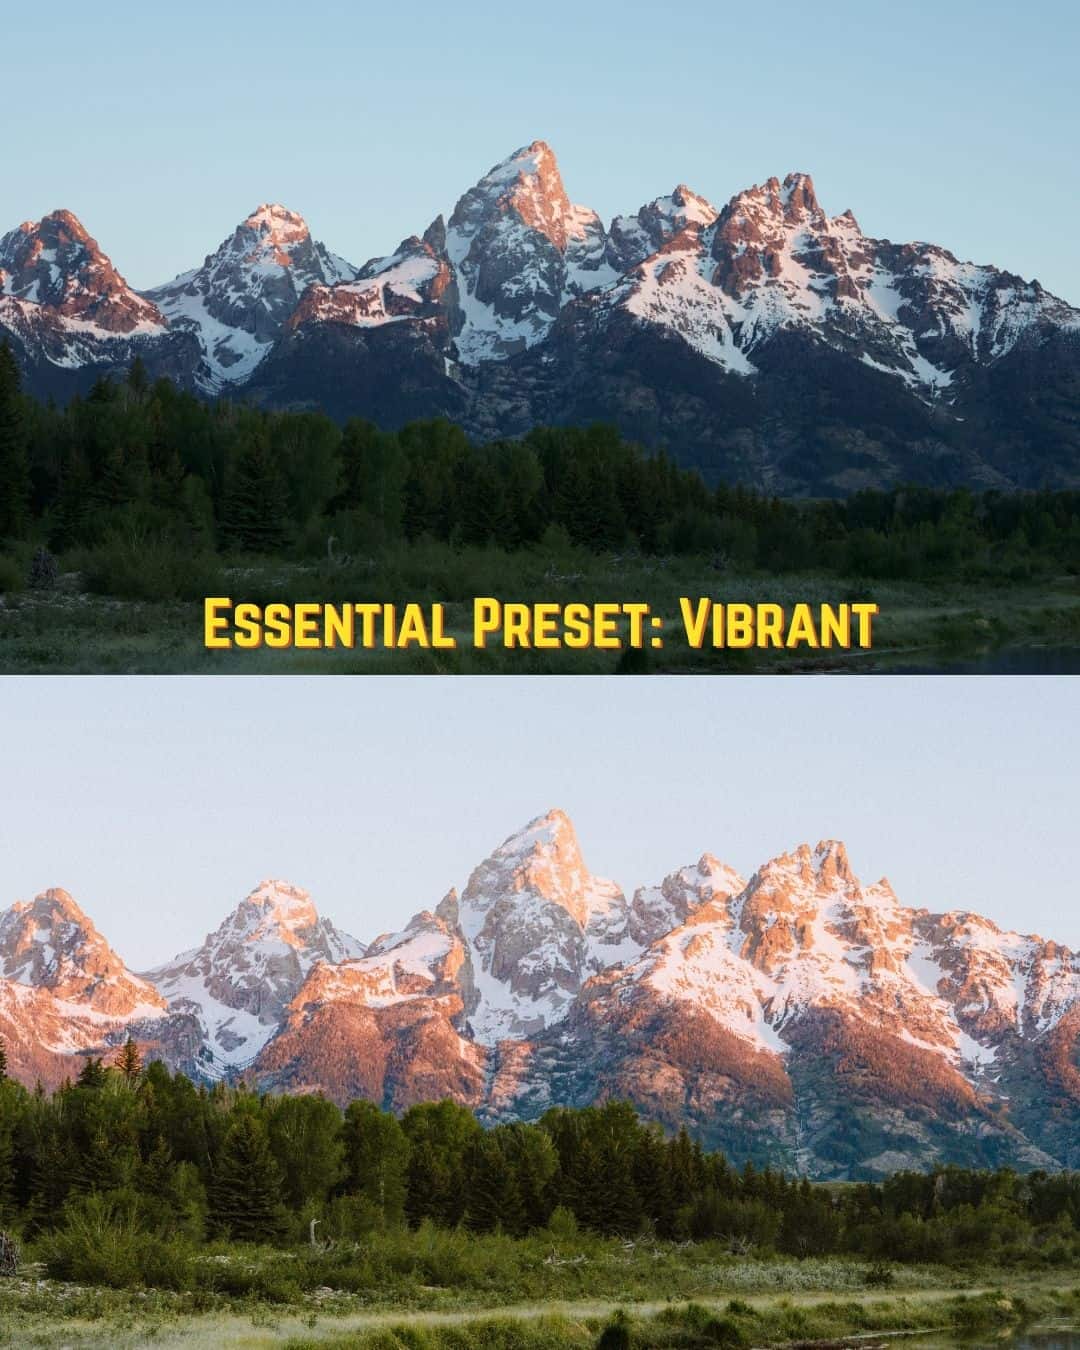
This base preset is inspired by the golden and blue hour film look, minus the grain. With this preset, I focus to maximize the vibrancy of each color in the image.
First, you want to adjust the EXPOSURE and then adjust your WHITE BALANCE.
This preset provides a much stronger contrast of colors than the rest of the Essential Base Presets. Therefore, you want to adjust your contrast and black sliders to your preference while keeping the saturation and vibrance.
I purposefully have these punchy colors so you can easily see the color best and tweak them as you go.
When To Apply: This is a go-to preset for me when I’m editing low light and golden/blue hour.
5.) Essential 05: Vintage B&W

This base preset is inspired by the perfectly aged and vintage black and white film look.
Out of all the preset in this pack, this black and white is the one you want to adjust the least. This is the closest to a “one-click preset” we have in this pack.
Play around with exposure and contrast (and maybe adjust more grain if that suits you). The rest is pretty easy and edited to perfection!
With a slight sepia tone integrated into the highlights and shadows, this preset is perfect to make that timeless black and white vintage look.
Looking for more photography inspiration?
You might like these posts!
- Our Foolproof Travel Photography Gear List
- 23 Perfect Gifts For Film Photographers This Season
- The 11 Best Instant Film Cameras For Travel
- The 12 Best 35mm Film For Brilliant Color Images
- Film Storage 101: How To Care For Film Before and After Development
- The 12 Best Film Cameras For Beginners
- 30 Brilliant Smartphone Photography Tips