
These aerial photography tips were sponsored by B&H Photo and originally published on the B&H Photo Explora Blog.
“Alright, your time in flight will be approximately twelve minutes.”
Berty and I swallowed that weighted sentence and nervously nodded in response.
Smiles were on the outside, but deep inside we were wondering how in the world we were going to make the most of those fleeting seconds in that helicopter and capture exactly what we wanted from the sky!

Aerial photography—seeing a place from a bird’s-eye view—can be exciting and exhilarating.
But it can also come with a lot of added challenges such as time limits, weather conditions, and—let’s be real—a large expense! (Flights aren’t cheap!)
Berty and I have had an incredible opportunity to take plenty of flight tours around the United States and Western Canada.
We’ve made mistakes, landed amazing triumphs, and learned a lot of lessons, so that’s why we’re here to share with you how you can maximize those precious moments in the air.
We want to share our aerial photography tips to help you be prepared and confident for your next skyward journey. Let’s get started!

What Makes Us Qualified To Share Aerial Photography Tips?
We should explain what makes us qualified to share aerial photography tips.
We won’t pretend to be professional aerial photographers, but we have been on quite a few flights!
Berty and I have learned a lot from those beginning experiences, so we wanted to help you skip the learning curve and get straight to the good stuff.
We hope this post can help refresh your aerial photography skills or allow you to learn new ones for your next flight.
You can read about plenty of these trips on our blog. Here are some of the aerial photography tours we’ve featured on our blog:
- Flying Over the Na Pali Coast in Kauai, Hawaii
- Doors Off Helicopter Tour – New York City
- Grand Teton National Park in Wyoming (Winter)
- Grand Teton National Park in Wyoming (Summer)
- Canadian Rocky Mountains – Canmore, Alberta
- Strathcona Provincial Park – 49 North Helicopters
BEFORE THE FLIGHT: Planning and Preparation
A great tour in the sky starts with proper preparations on the ground.
Here’s what you can do to prepare for a productive and enjoyable time on your next aerial photography flight:
1. Know What You Want to Photograph
Knowing what you want to photograph always begins with researching the destination.
Are there specific landmarks or locations you’d like to visit? Spend a little time getting to know the area over which you’ll be flying, and what scenes or landmarks can be seen from the sky.
Visualize how you want to frame your final images. Once you have an idea of how you want to achieve these photos, talk with the pilot to discuss your desired routes and angles.
Finally, look at other photographers for inspiration. Look at their images, study them to see what you like and dislike about their images, and then go on to create your own style and capture the scene in your own way.
2. Know the Ideal Time of Day for Your Aerial Photography Flight
Do you want to shoot during sunrise? Sunset? Harsh middle-of-the-day light? Consider these light conditions before flying.
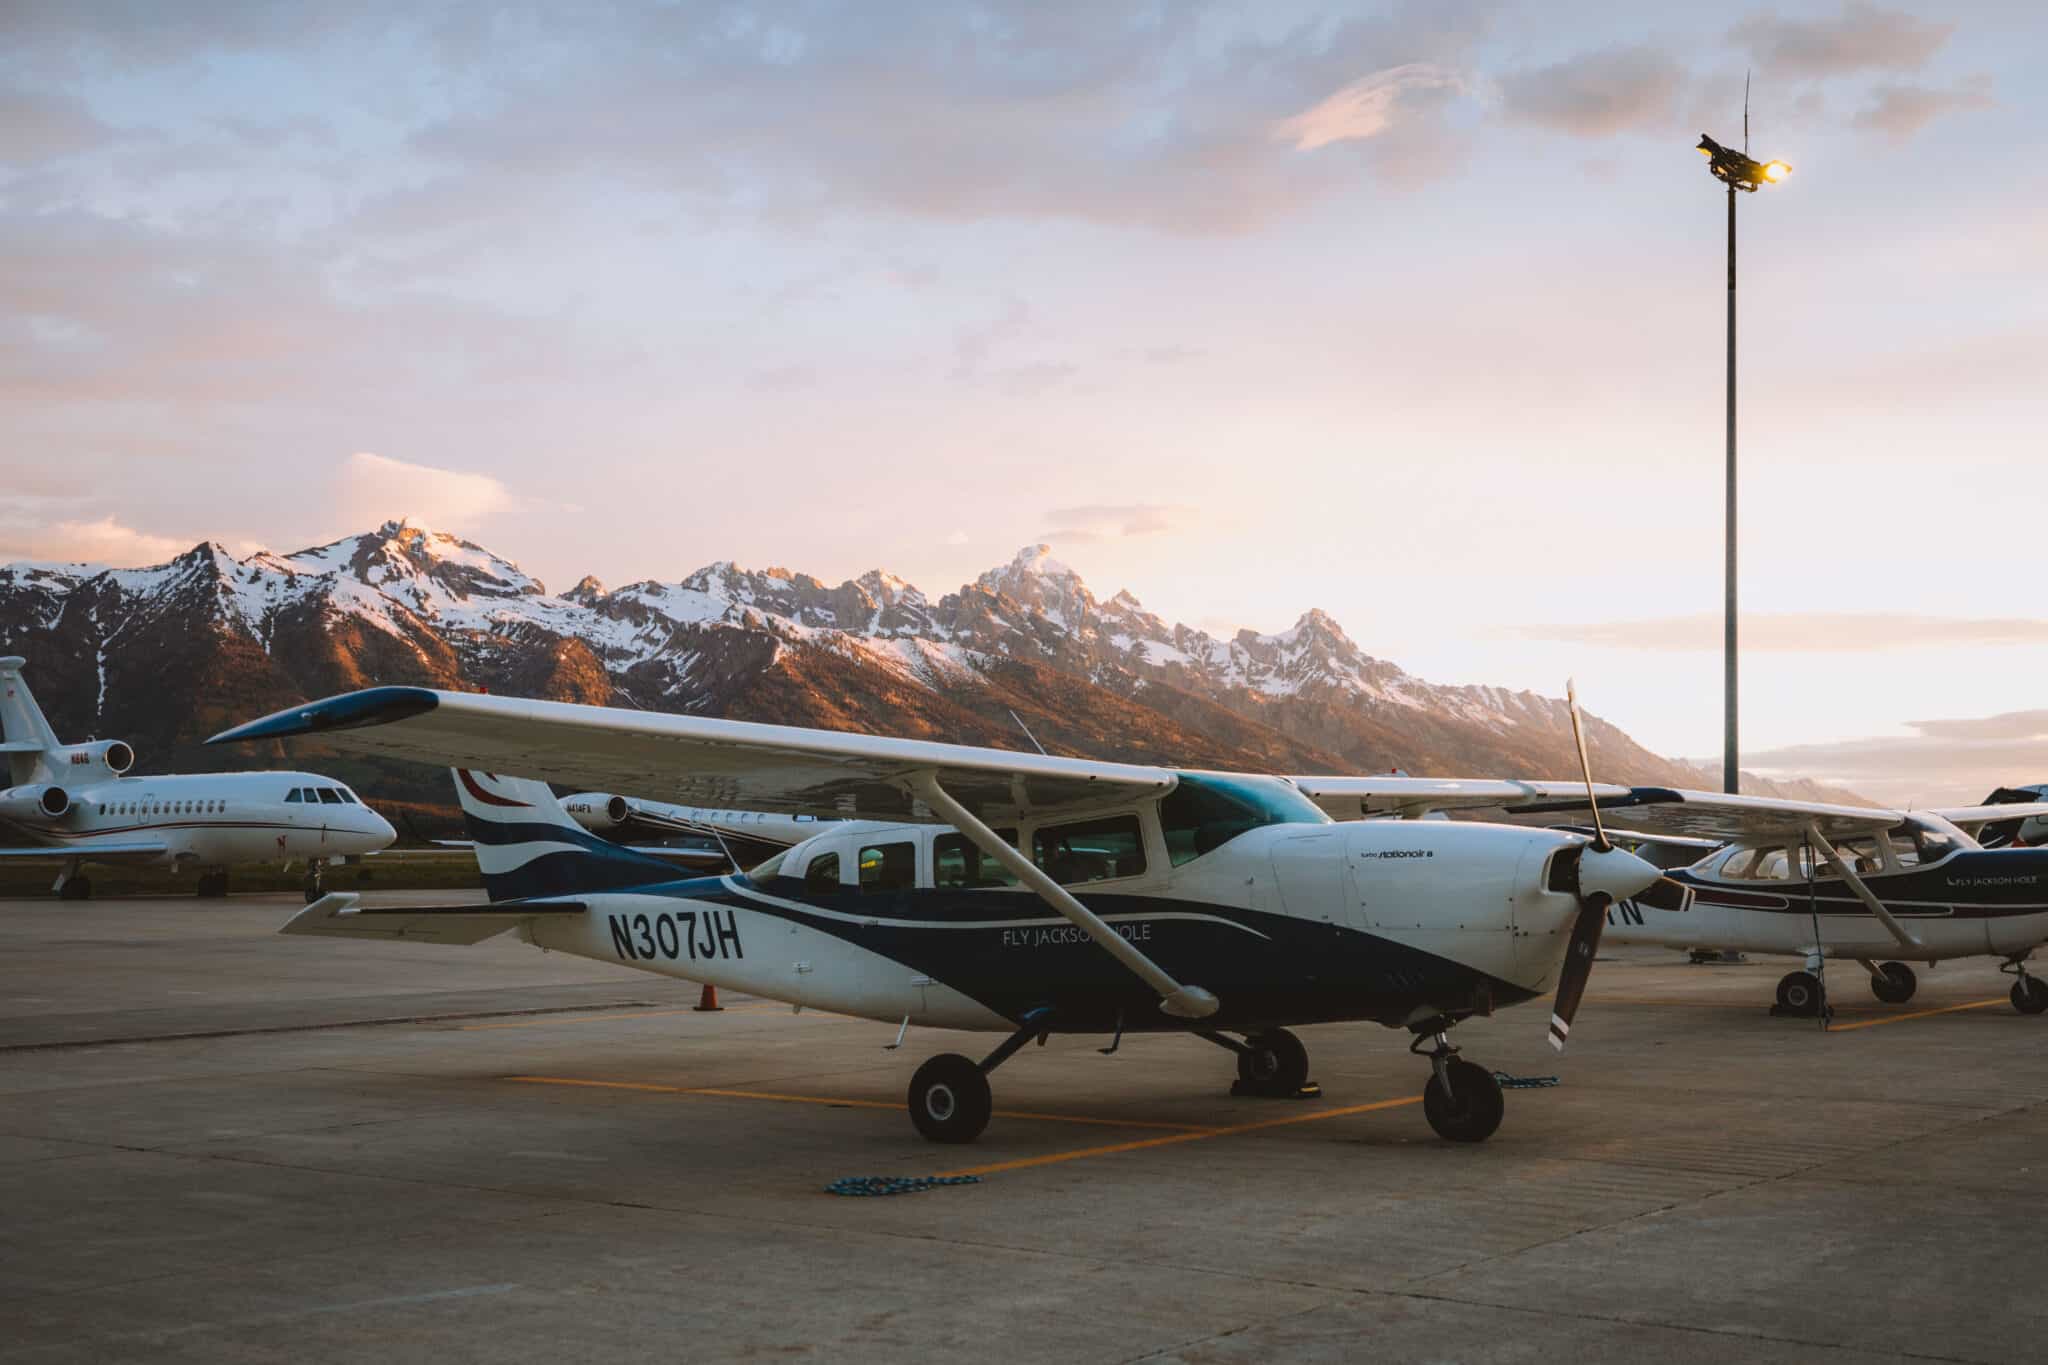
For instance, when we flew with Fly Jackson Hole, during sunset, we wanted to capture the west side of the Tetons, looking east from the plane. This way we could see the glow on the tip of the Teton range.
It’s also important to be in communication with your pilot to know if they can operate during the time of day you desire.
Some airports and companies have restrictions on when they are allowed to take off.

3. Limit Yourself to Two Camera Bodies
When shooting aerial images, time is of the utmost importance. This is why we recommend bringing two camera bodies, with your two desired lenses.
With two cameras, you can switch easily between lenses without having to change them on the same body in the air.
If you have any more than two devices, you’ll be more concerned about giving your gear equal attention than you are to looking out the window (which is why you’re in the air in the first place!).
Two bodies can be a combination of a variety of devices, including phones, GoPros, and/or DSLR cameras.
An exception would be a GoPro strapped to your head or chest to keep yourself hands-free. (Just make sure they aren’t in the way of your camera!)
Scroll down to tip 5 for our camera setup, and 18, where we talk about all the different kinds of camera straps for aerial photography!

4. Choose the Right Lens
Choosing the right lenses for aerial photography depends on what you are shooting!
We like to carry versatile lenses with us to cover a wide range of possible images.
Here is a list of lens suggestions to bring on your aerial photography flight and some reasons for their use in the sky.
- EF 16-35mm f/2.8 — for capturing a wide landscape and interior photo of the plane or helicopter.
- EF 24-70mm f/2.8 or RF 28-700mm f/2 — great for capturing a wide landscape or tight shot for the texture or close-up shots of your subject; also great for interior photos, as well as taking portraits of the people inside the plane or helicopter.
- EF 35mm f/1.4 — great for capturing a wide landscape in low light during the blue hour (before sunrise or after sunset)
- EF 50mm f/1.2 — great for capturing a tight landscape in low light during the blue hour (before sunrise or after sunset)
- EF 100-400mm f/4.5-5.6 — great for capturing a faraway subject like the Grand Prismatic and also to get some texture on your subject.
Our aerial photography gear is generally all from Canon. However, most camera brands have their own, very similar offerings.
If you have any questions for your specific camera be sure to ask in the comments section, below!
5. Choose the Right Camera
Now, Berty and I are Canon shooters, so we will recommend gear based on that bias.
However, we know that other DSLRs such as Sony, Nikon, and Fujifilm also have incredible capabilities when shooting high-speed moments.
Our current setup during an aerial photography tour would be the primary shooter using the Canon EOS R and the 5D Mark III, and the second shooter using the Canon EOS 5D Mark IV and the GoPro HERO7 to capture some behind the scenes.
Camera brands aside, the best aerial photo cameras need to have high resolution with fast shutter speeds and high ISO range.
A camera with a powerful processor along with a fast lens is the best combination for aerial photography.
Want to get creative? Try shooting aerial photography on a film camera, and choosing a beautiful 35mm film in color for some unique photographs!

6. Plan the Route with Your Pilot
It’s essential to express your intentions and hopes with the pilot before your flight, so you’re both on the same wavelength!
After all, you and the pilot are on the same team.
Having a mutual goal in mind before and during the flight is huge. While requests should be expressed, it’s also important to remember that the pilot knows best.
They’ve flown around the area more times than you know, and probably know it like the back of their hand!
During your research, consider consulting your pilot and asking for their favorite locations. Finally, respect your pilot and their decisions in those critical moments.
Their job is to FIRST keep you and your party safe, so listening to their suggestions, comments, and decisions in the moment are very important.

7. Check the Weather Before Your Photography Flight (but Don’t Worry too Much)
Weather can change rapidly, so keep a flexible schedule (and attitude!) when planning your aerial photography flight.
We highly recommend booking your aerial photography flight in the early part of your trip, so you have time to reschedule if plans go awry.
Clouds in the sky? Don’t fret. Clouds can add a certain drama to a photo that a sunny day simply can’t! Know that no matter how many times you visit an area, it can look completely different.
8. Pack Extra Memory Cards and Batteries
Nothing is worse than being in the moment when a battery dies or your memory card fills up! Make sure to put your batteries on a charger the night before your flight to ensure they are at full capacity.
At home, we like to keep the battery slot on our camera open and beside the charger so there’s no chance of us forgetting to put it back in the camera before we go.
In the air, a trick we like to do during our aerial photography flights is to keep extra batteries in our zipped pockets, for easy access when one gets drained.
To ensure you have enough memory space for your aerial tour, we suggest starting the flight with a formatted card and, ideally, the largest card you have. We typically take 1,500-2,000 images for a two-hour flight, which would fit on a 64GB card.
Keep in mind that you may want to pace yourself, depending on what type of storage you have on hand during your flight. The worst thing is to run out of storage mid-air! We typically pack three extra cards, just to be safe. Again, all of these cards and batteries go into our zipped pockets for easy access.
Be sure to choose memory cards with fast read and write speeds so you don’t miss a single second of the action. We use these SanDisk 128GB Extreme Pro cards for their huge data capacity and fast processing power.
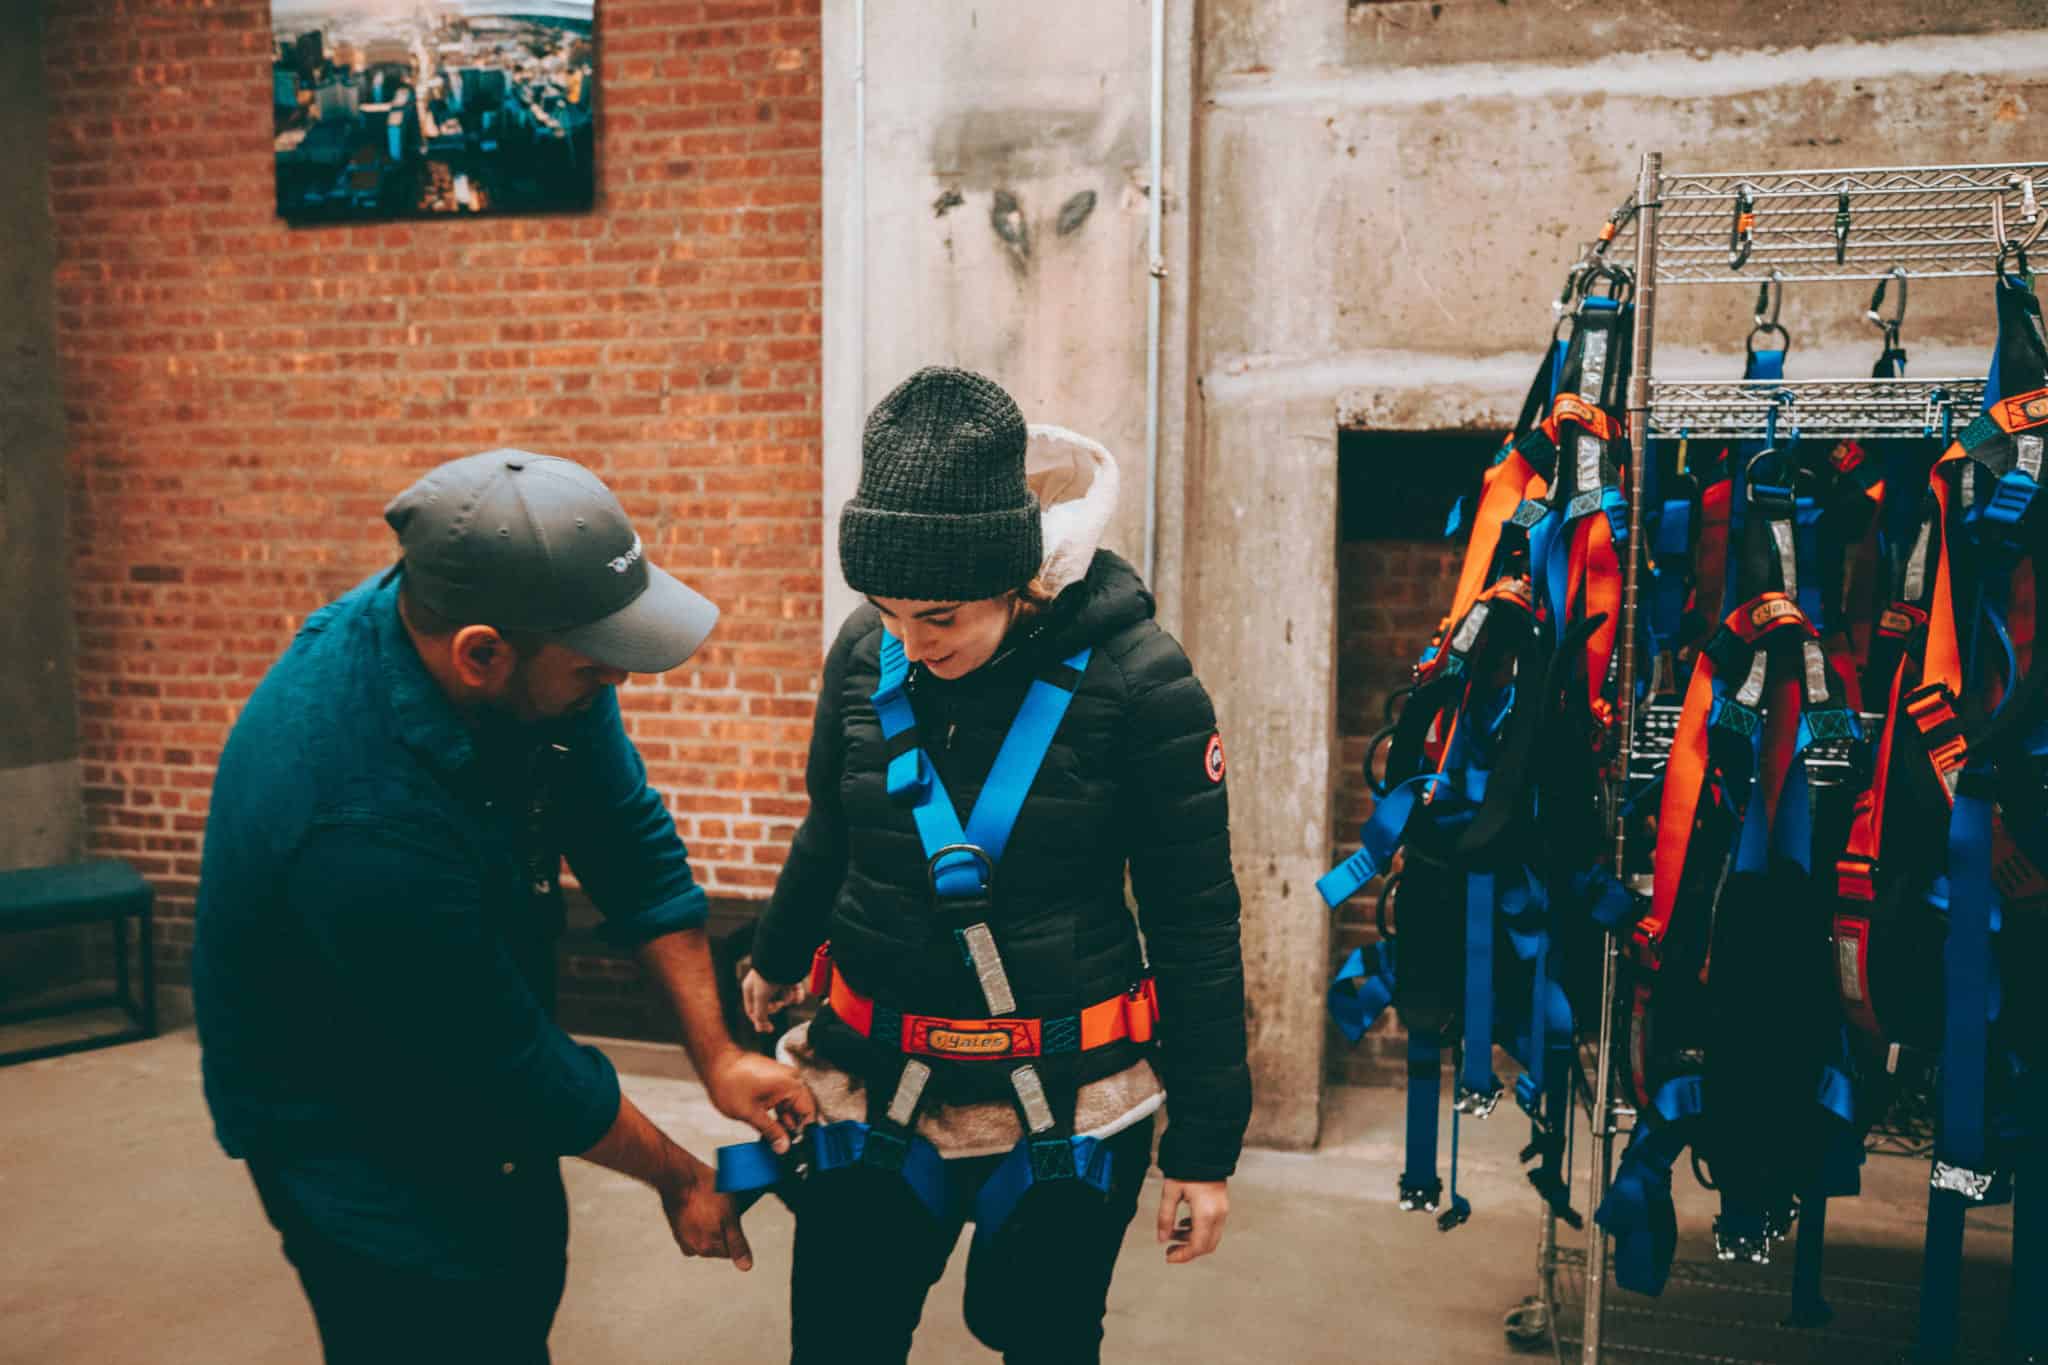
9. Wear Clothing that Allows Easy Mobility
Safety buckles, straps, and headsets are an essential part of aerial photography tours, but they can often make you feel cramped and awkward in that small space.
While you cannot control these safety straps, you can control what you wear to the flight. Make sure to plan your outfit and gear ahead of time.
Ditch the bulky hoodies and flowy sleeves. Make sure to wear tighter-fitting clothes that won’t catch on things or blow in the wind.
It’s also important to sort yourself out in your seat before you depart. Make sure your camera strap is free from the seatbelt, and that you have full mobility of your arms and camera before takeoff.
IMPORTANT: Make sure your clothing has easily accessible pockets, ideally ones that zip. This way you can store those extra batteries and memory cards where you can reach them!

IN THE AIR: Aerial Photography Tips for the Big Moments!
10. Set and Know the Ideal Camera Settings for Aerial Photography
When considering camera settings for aerial photos, it’s important to know a few key things about your camera.
High shutter speed is very, very important. Even when it doesn’t seem like it, the plane or the helicopter is moving really fast.
Shooting at 1/1,000 of a second and above can increase the likelihood of your photos being in focus. If the image feels too dark, you can bump up your ISO or open your aperture to around f/3.5 or f/4 to balance your exposure.
Flights also come with turbulence and unexpected shaking, so if your camera has an image stabilization option, now is the time to use it!
Here are the detailed camera settings that we typically use on a flight.
- Shooting Mode: Manual
- Shutter Speed: 1/1,000 – 1/8,000 of a second
- ISO: 100-3200
- Aperture: f/1.2-f/8
- AF Mode: Servo — The subject you’re photographing is always moving, so use the Servo mode for continuous autofocus on the subject.
- Drive Mode: High-Speed Continuous (AKA Burst Mode)
- White Balance: Auto White Balance
- Metering Mode: Evaluative
- Image Quality: RAW

11. Shoot Raw
Does your DSLR camera have the ability to shoot RAW photos?
By default, most digital cameras convert files into JPEG, since they are smaller files that take up less space on your memory card.
However, we don’t want to be saving space if it’s going to cost us image quality, especially with aerial photos. In this instance, it’s important to maximize your camera’s image-rendering potential and change the capture setting to RAW.
Shooting in RAW format will give you more megapixels to work with during post-production editing.
You have more control over each photo’s dynamic range, and these files help you adjust things like white balance, saturation, and exposure more easily.

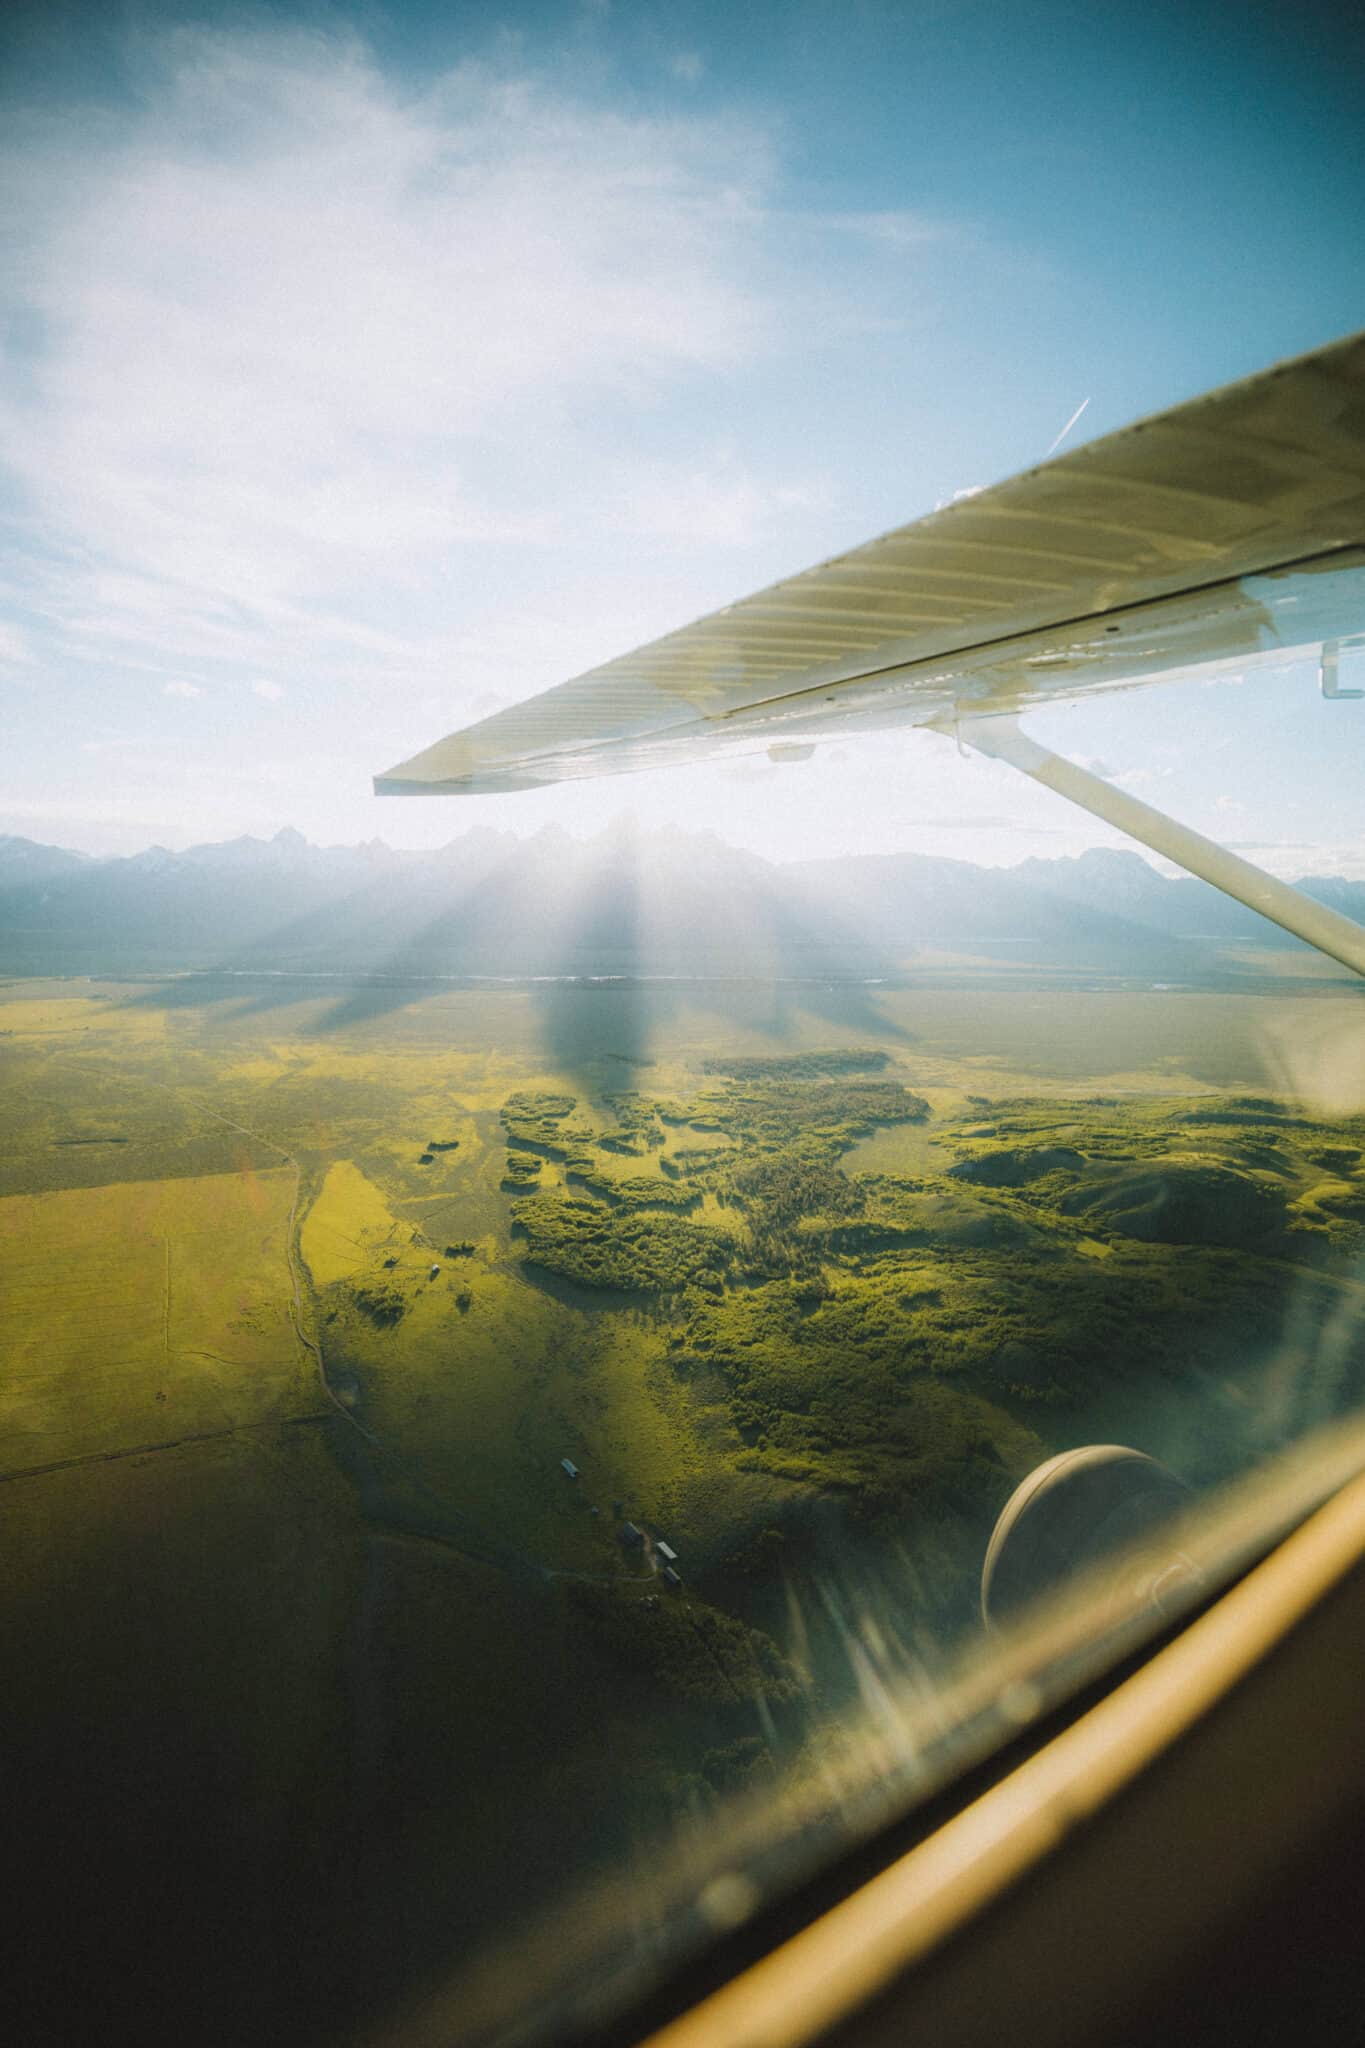
12. Minimize Window Reflection
If you are taking a flight specifically for aerial photography (not just scenic or transportation in contrast), it’s likely the plane will have windows that open, or a slider from which you can stick your lens out.
This would be the most ideal situation since you don’t have to worry about window glare!
However, helicopters and small planes commonly have plexiglass windows, which can cause glare in your images. The best way to minimize those light distortions is to keep the front lens element as parallel to the window as possible.
Aircraft windows can often be dirty, scratched, or even curved. To control what you can about your window situation, bring a lens cloth and give your window a quick wipe-down before the flight.
It’s also important to wear dark clothing to minimize the glare from yourself! Logos, letters, and even shiny belts will show up in your photos, so try to wear a dark and minimal wardrobe so you aren’t the problem.
If you simply can’t deal with the reflection, try using a lens skirt to cover the glare. These can suction onto the window, creating a controlled space for lighting. Make sure you purchase one that can fit the length of your longest lens.

13. Shoot in Portrait and Landscape Orientation
Excitement can sometimes get the best of you when you’re in the air and experiencing the magic right before your eyes!
Shooting both portrait (vertical orientation) and landscape (horizontal orientation) will give you plenty of image diversity.
Always diversify and think about the composition of the final images you want. This will allow you more options when considering prints, posters, and client needs.
14. Shoot the Entire Time!
Don’t stop shooting. Make the most of your short time in the sky. The biggest mistake we see with photographers is when they stop and review their photos on the LCD each time they release the shutter.
You didn’t spend all that money to just sit there and review your photos! Keep on shooting. It’s okay to review once in a while, but not every time you take a photo because you’ll miss a lot of the action.
If you feel like you’re seeing the same composition, start to think outside the box. Even the tiniest change in angle or altitude can make a huge difference. Think about how you can improve the next photo you’re going to take.
15. Forget the Lens Hood
Your pilot will probably tell you to ditch the hood, but if they don’t, it’s probably a good idea anyway.
There are many reasons to leave that lens hood at home. If it falls, it could damage the aircraft, hurt someone on the ground, or even limit your ability to move freely in the cabin.
If you’re worried about glare, play around with your angles, or just use your hand to shield the lens in that particular moment. (or use that lens skirt we talked about above.)
Also, the dark clothes you’re wearing will help reduce glare.
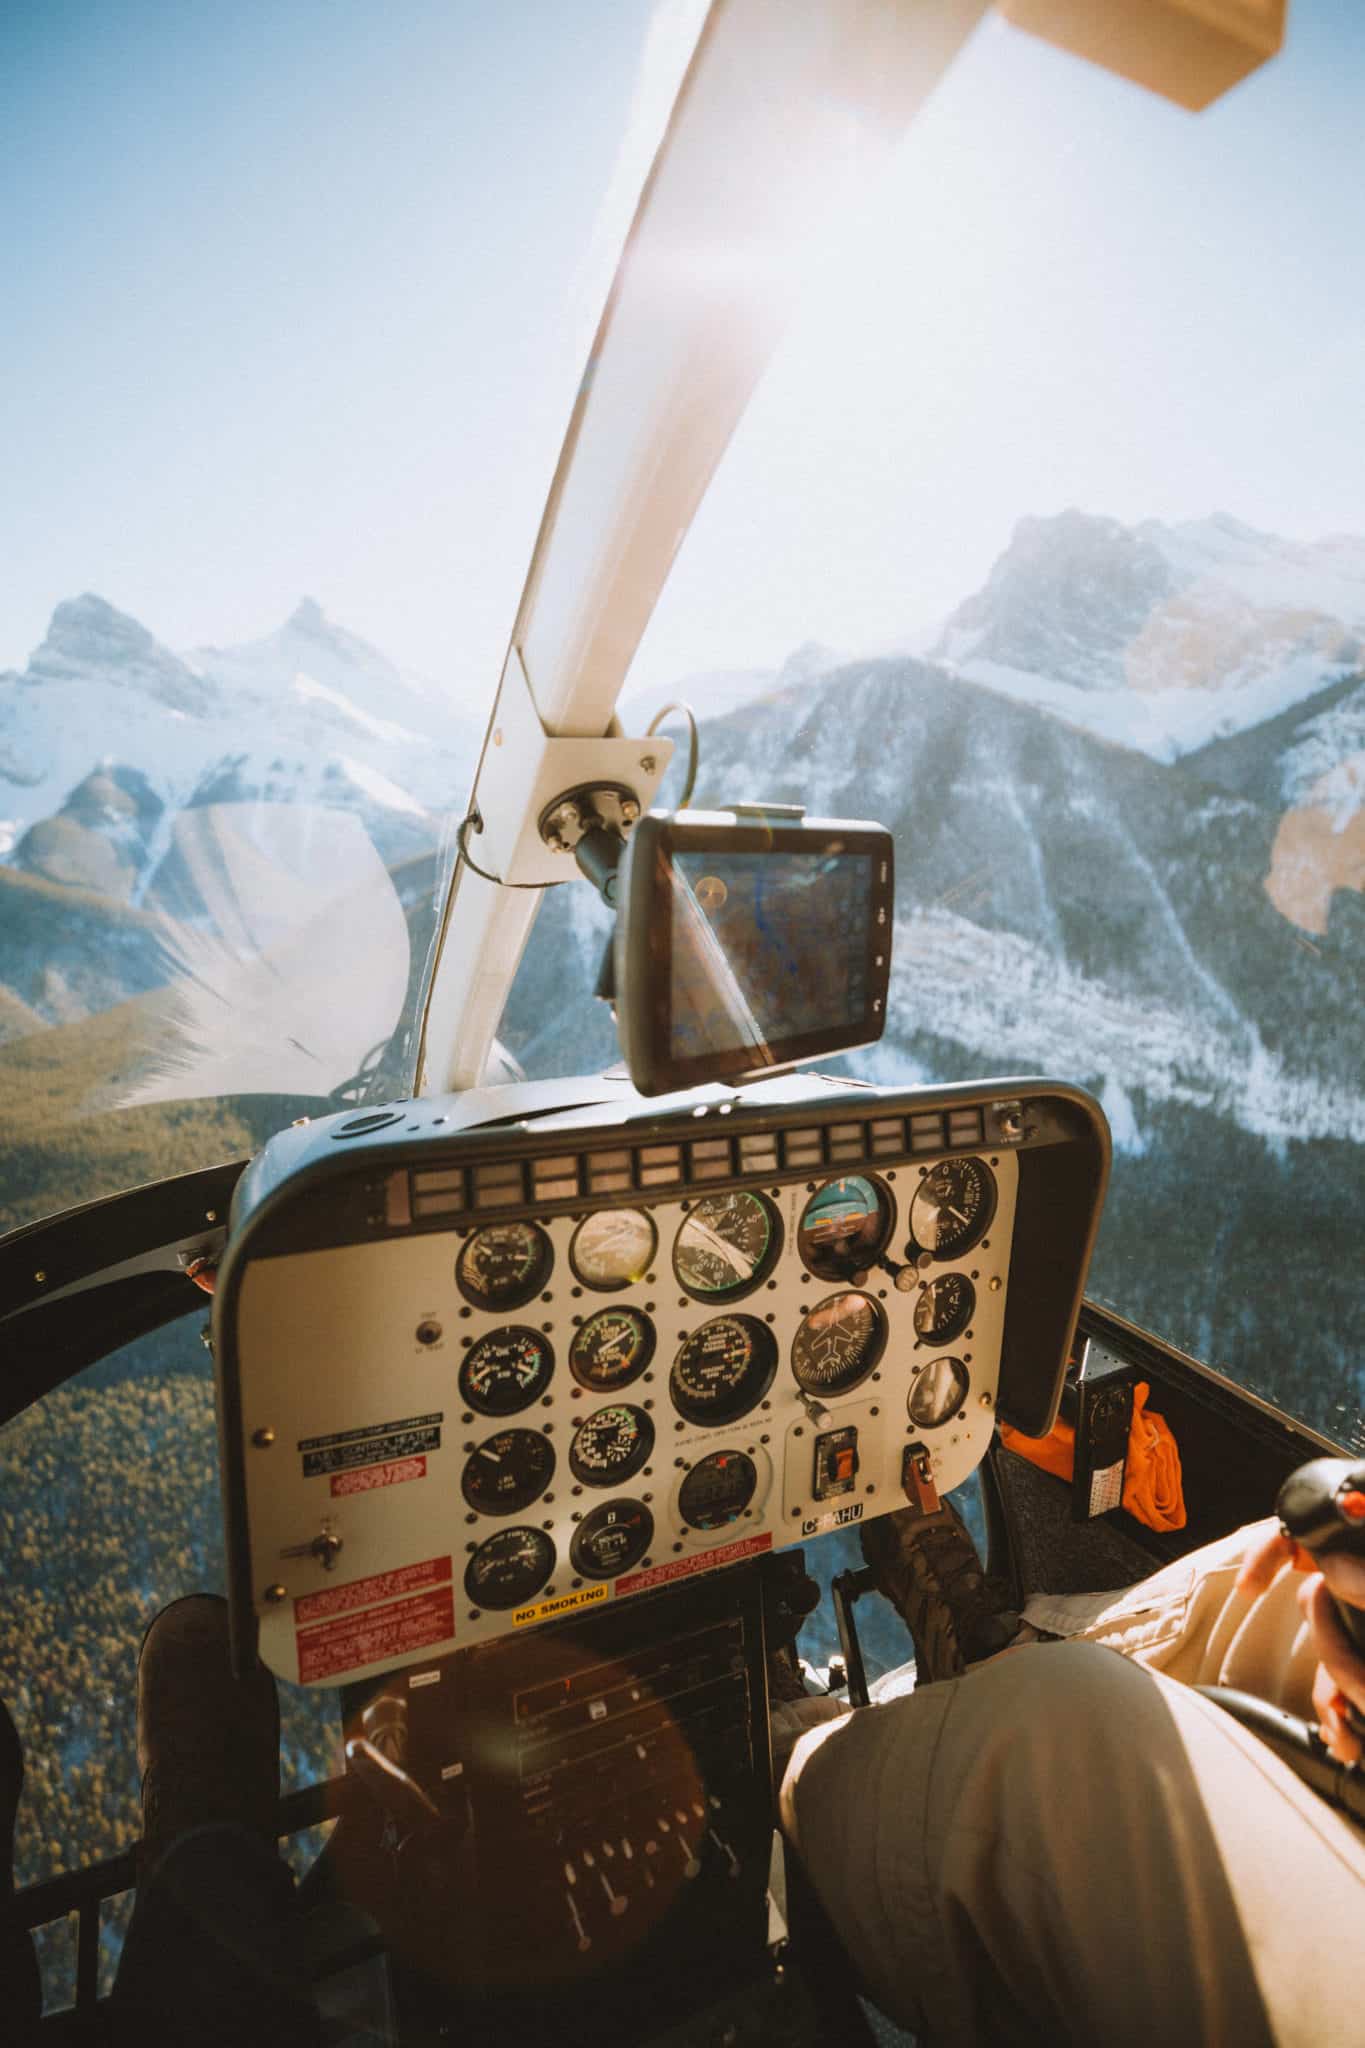
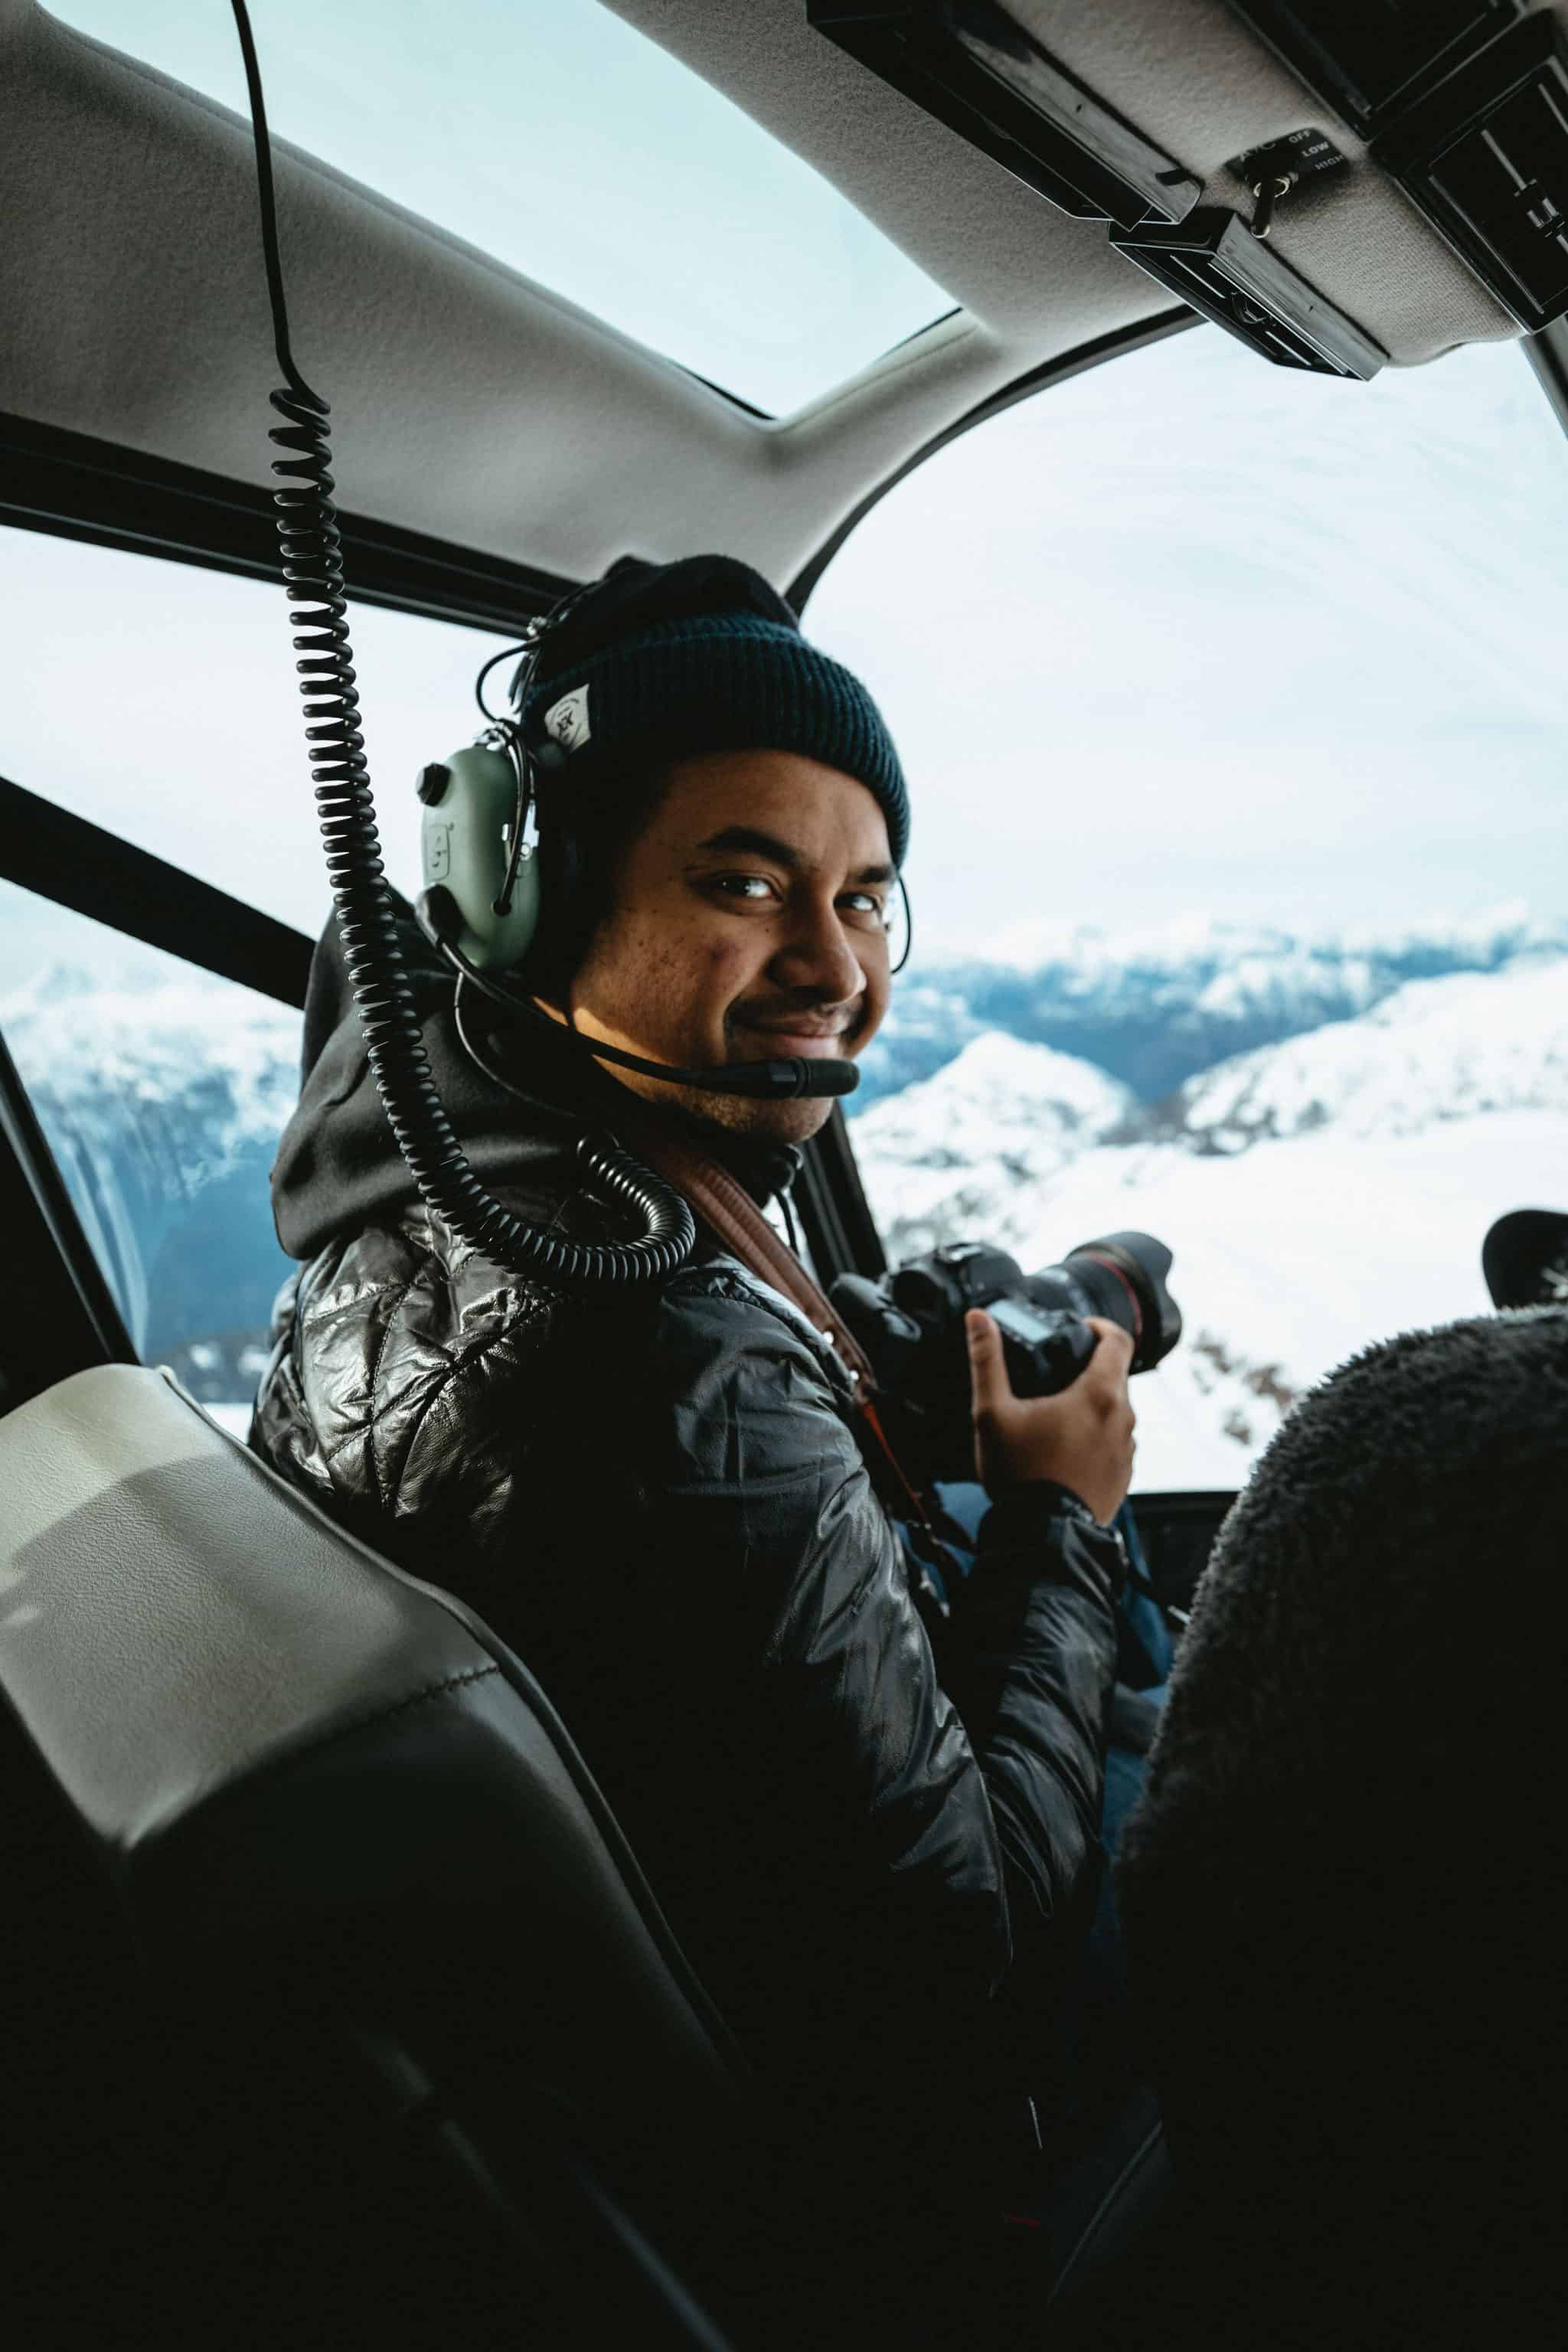
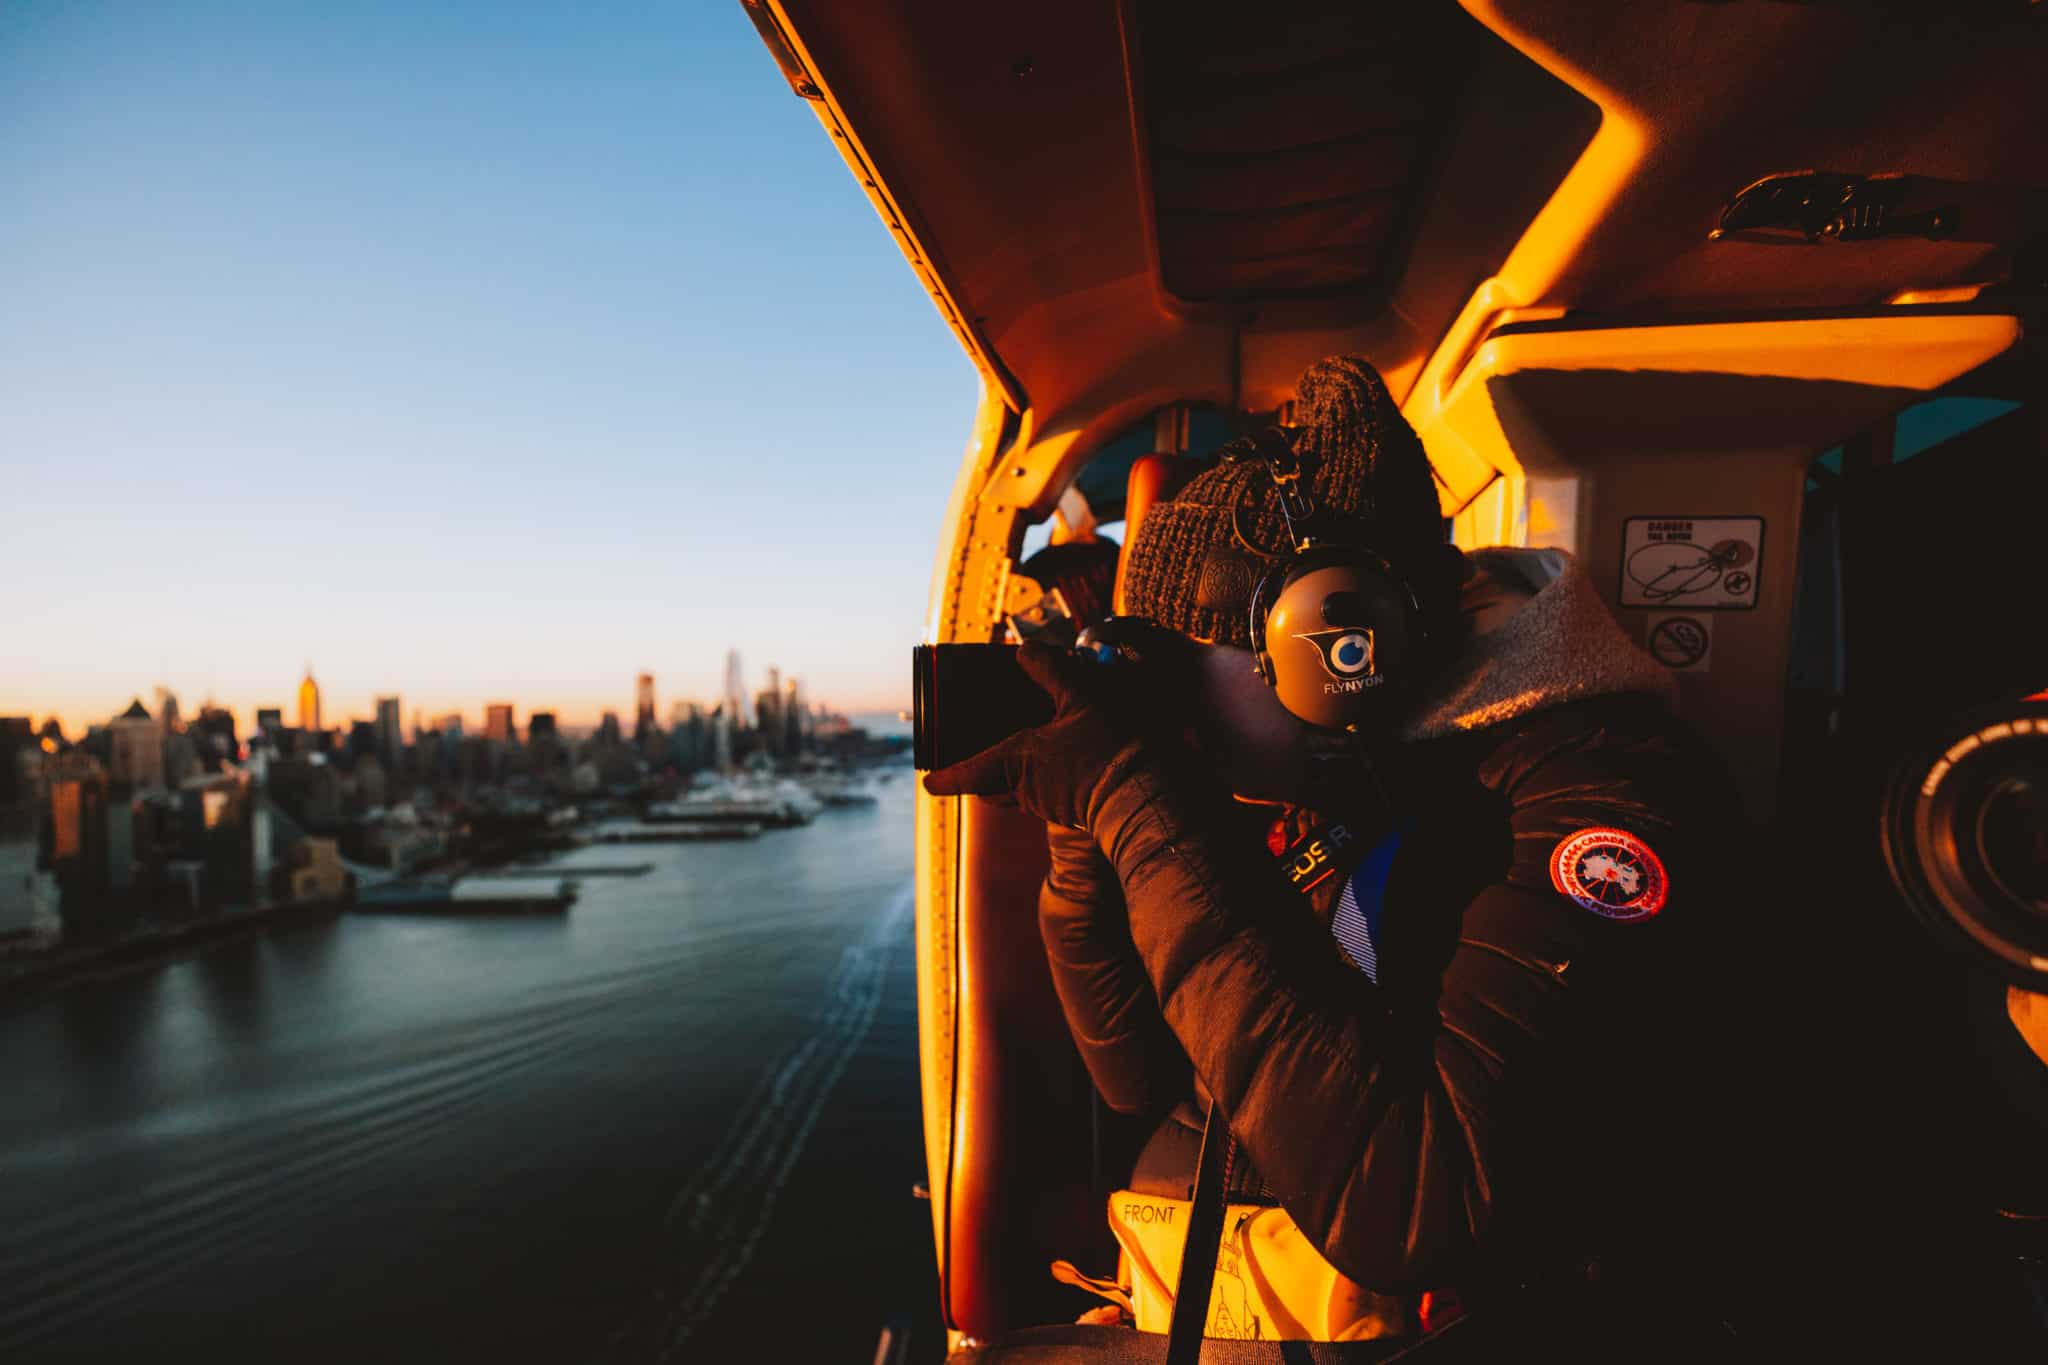
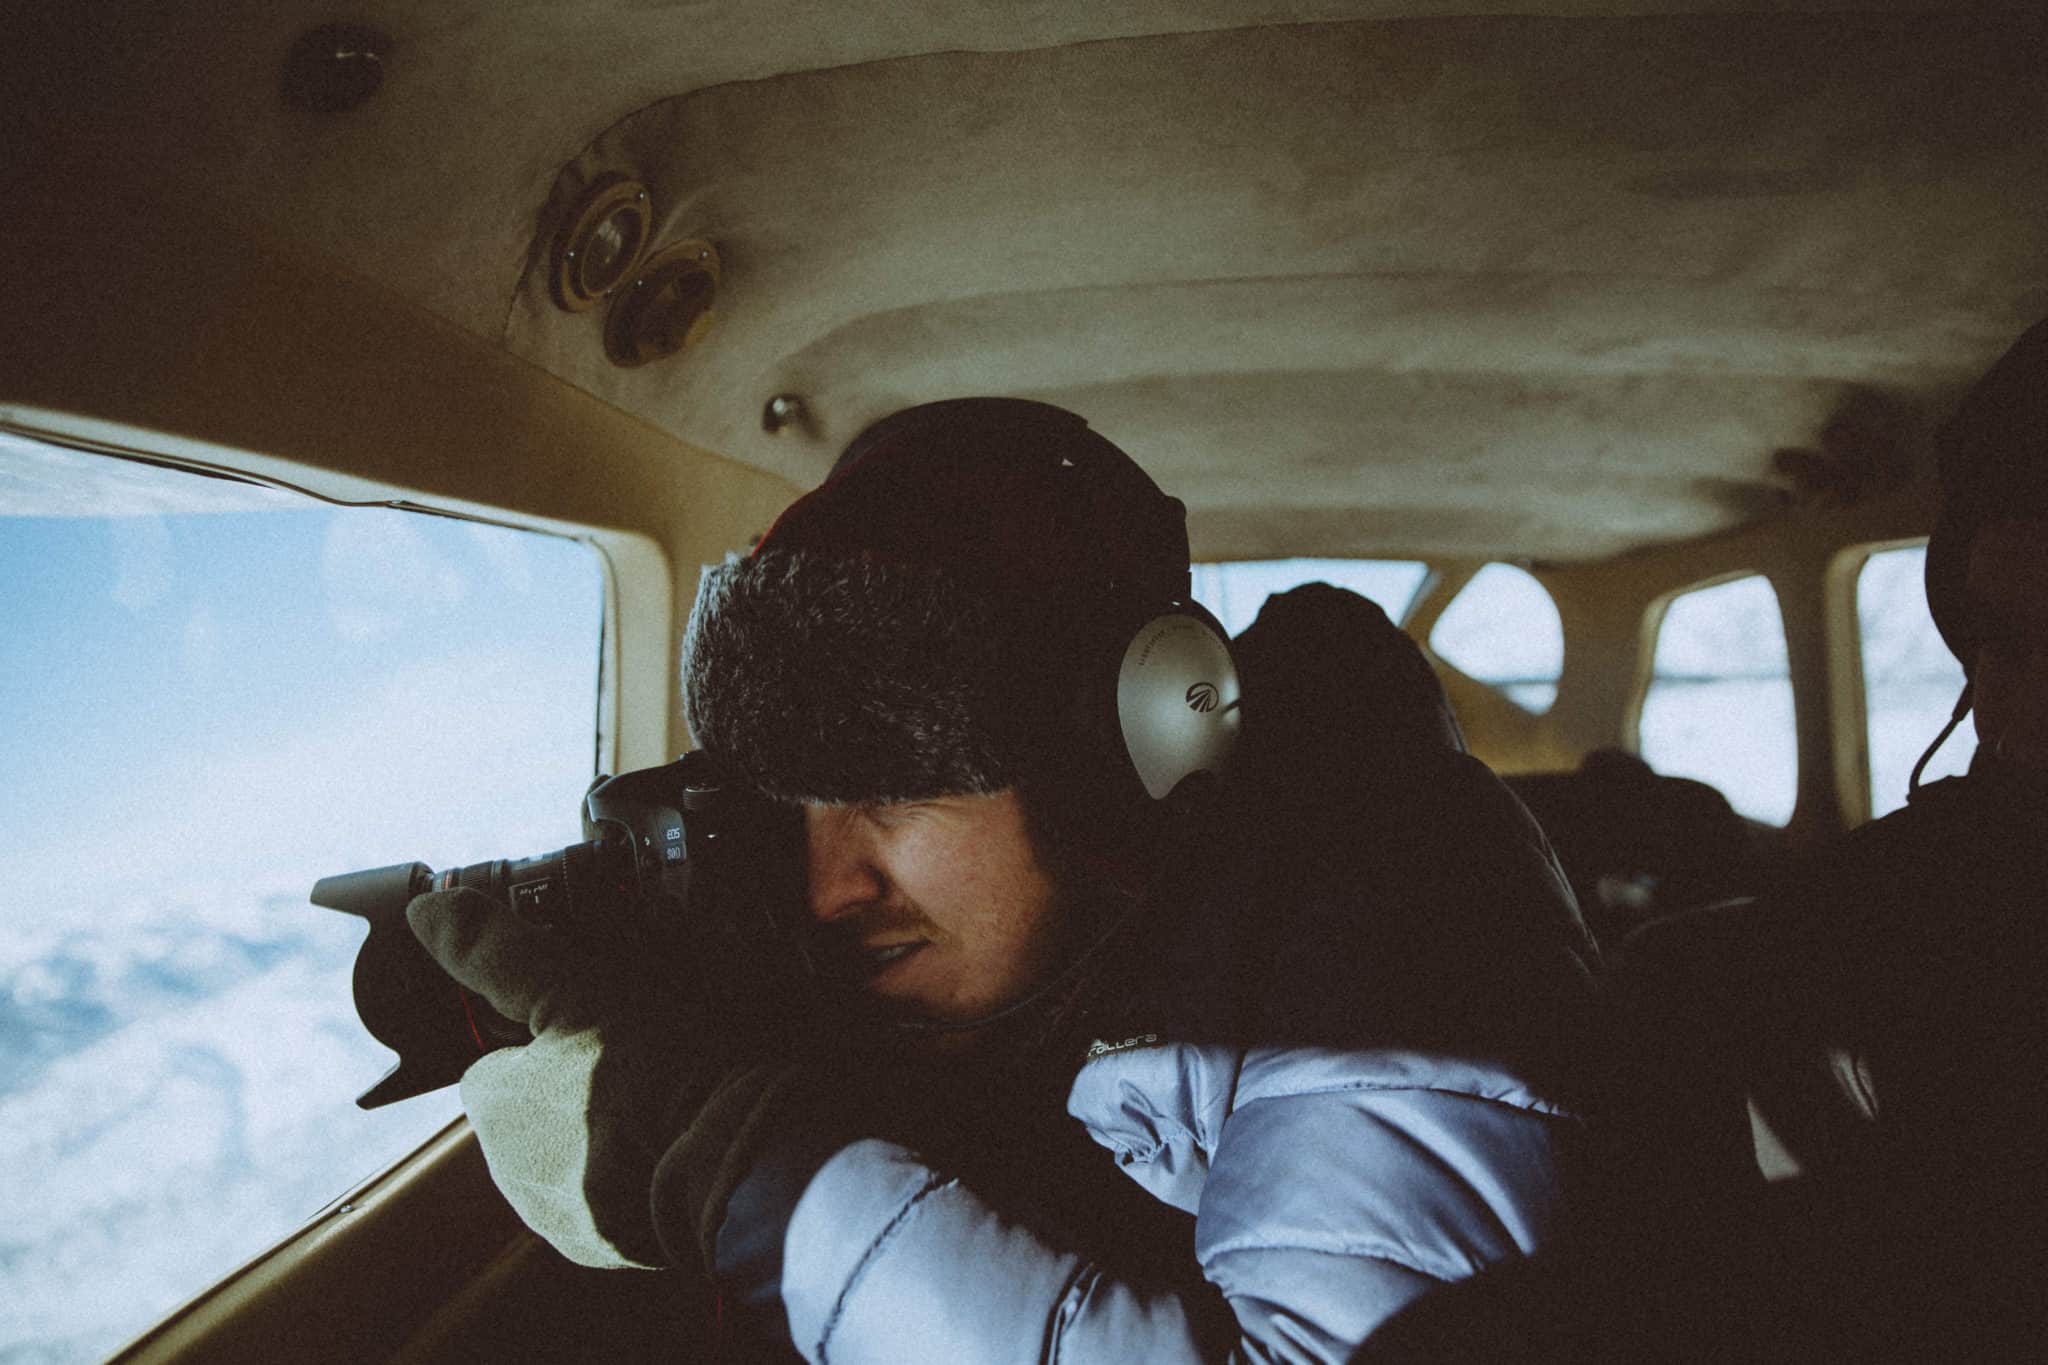
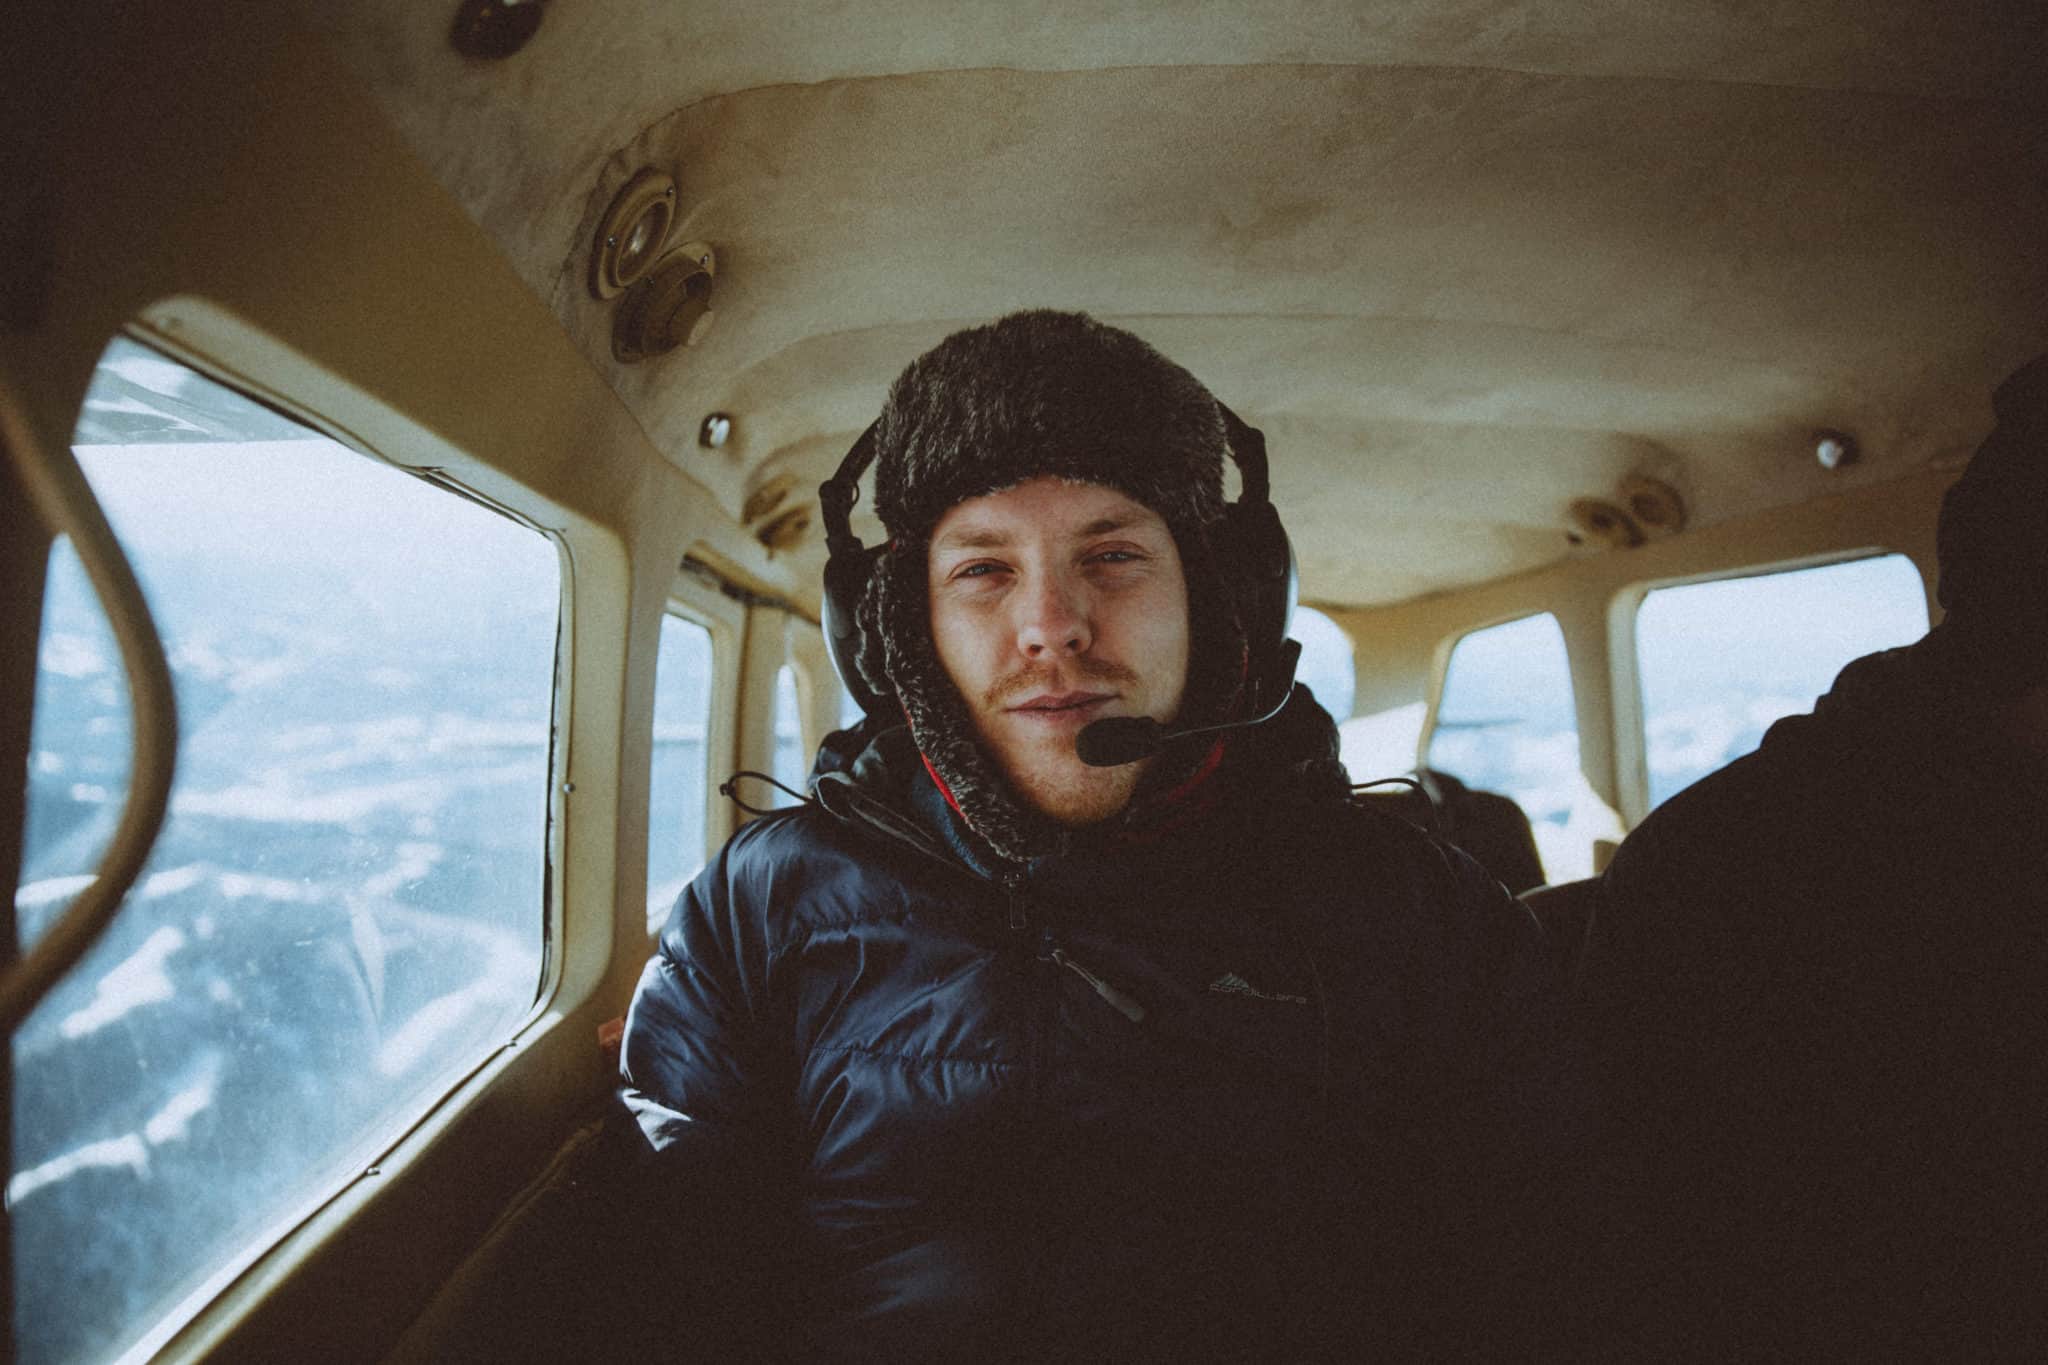
16. Don’t Forget the Interior!
When looking back on your flight experience, it’s always nice to know the story behind the images. Who was aboard? What did the cockpit look like? Who was your pilot?
When we take photos, we strive to tell the best stories from our experience. We love to include everything such as the details of the cockpit, textures on our pilot’s hands, their portrait while flying the plane, etc.
Between all the beautiful snaps out the window, make sure to spend some time capturing the interior of the plane too! Capture the seats, the buttons, the handles, and headsets.
POST-AERIAL PHOTOGRAPHY FLIGHT: What to Do with Your Photos
The aerial photography tips don’t stop once you’re back on the ground! In order to make the most of the amazing images you took in the sky, here’s what to do next.
17. Share Your Work!
You’ve put so much hard work into reading these aerial photography tips, kudos for making it this far!
Now, your work needs to be seen by the world! One way to share your photos is by tagging the air company on social media or sending them some previews via email. They will appreciate it.
During a photography slow season, you can also collect your favorite images in a blog post and share them with a wider audience. Regardless of down time or not, make it a priority to share your work!
ADDITIONAL TIPS FOR AERIAL PHOTOGRAPHY
Tips for a Doors-Off Flight
Doors-off aerial photo tours can provide some exciting experiences. You feel the wind whip between your feet, and there’s no separation between you and your subject!
No doors also mean no barriers, so you can forget about worrying about dirty windows or warped glass. However, no doors mean more safety considerations.
Read the following aerial photography tips for a doors-off flight:
18. Secure Your Camera to Your Body
Securing your camera applies to all aerial photography flights, but is of the utmost importance when shooting without a door.
Yes, you can use your camera’s default neck strap, but depending on the photos you want to take, you may feel a little limited.
You’ll want to be able to extend your arm a decent length but still have a secure way to keep your camera on your body.
Here are some suggestions for accessories to secure your camera to your body.
- CL-3 Clutch by Peak Design — Recommended for use inside a windowed aircraft
- BlackRapid Sport Breathe Camera Strap
- HoldFast Gear Money Maker — Fast access for two cameras
But on the accessories note…
19. Keep the Accessories at Home
That lens hood we talked about earlier? That cleaning cloth? Ditch ’em for a doors-off flight. Not only could they get in the way, but they could also be a safety hazard.
Photography accessories can be a great way to make the most of your gear – but this isn’t the time to utilize most of them.
If something falls off your camera and gets sucked into the propellers, it could be fatal. Don’t take your chances with add-ons and extras.
20. Wear Proper Gloves
Temperatures can drop drastically at high altitudes. Combined with high wind speeds, that can really take a toll on your hands and fingers!
While this tip is location dependent, we like to pack gloves for our aerial photography tours.
When choosing a pair of gloves, it’s important to consider mobility, warmth, and versatility. We like gloves that have touch-screen compatibility, removable finger covers, and/or a thin profile for maximum warmth and use.
Consider an open-mitten type, with a shell liner on the inside. This will keep your hands extra warm, but also give you the option to use your extremities when necessary. Gloves also make perfect gifts for film photographers and digital photographers alike!
Here are some suggestions for photographer gloves we recommend.
- RucPac Professional Tech Gloves (thin, liner-style)
- Freehands Women’s Stretch Thinsulate Gloves
- Freehands Men’s Finger Mittens
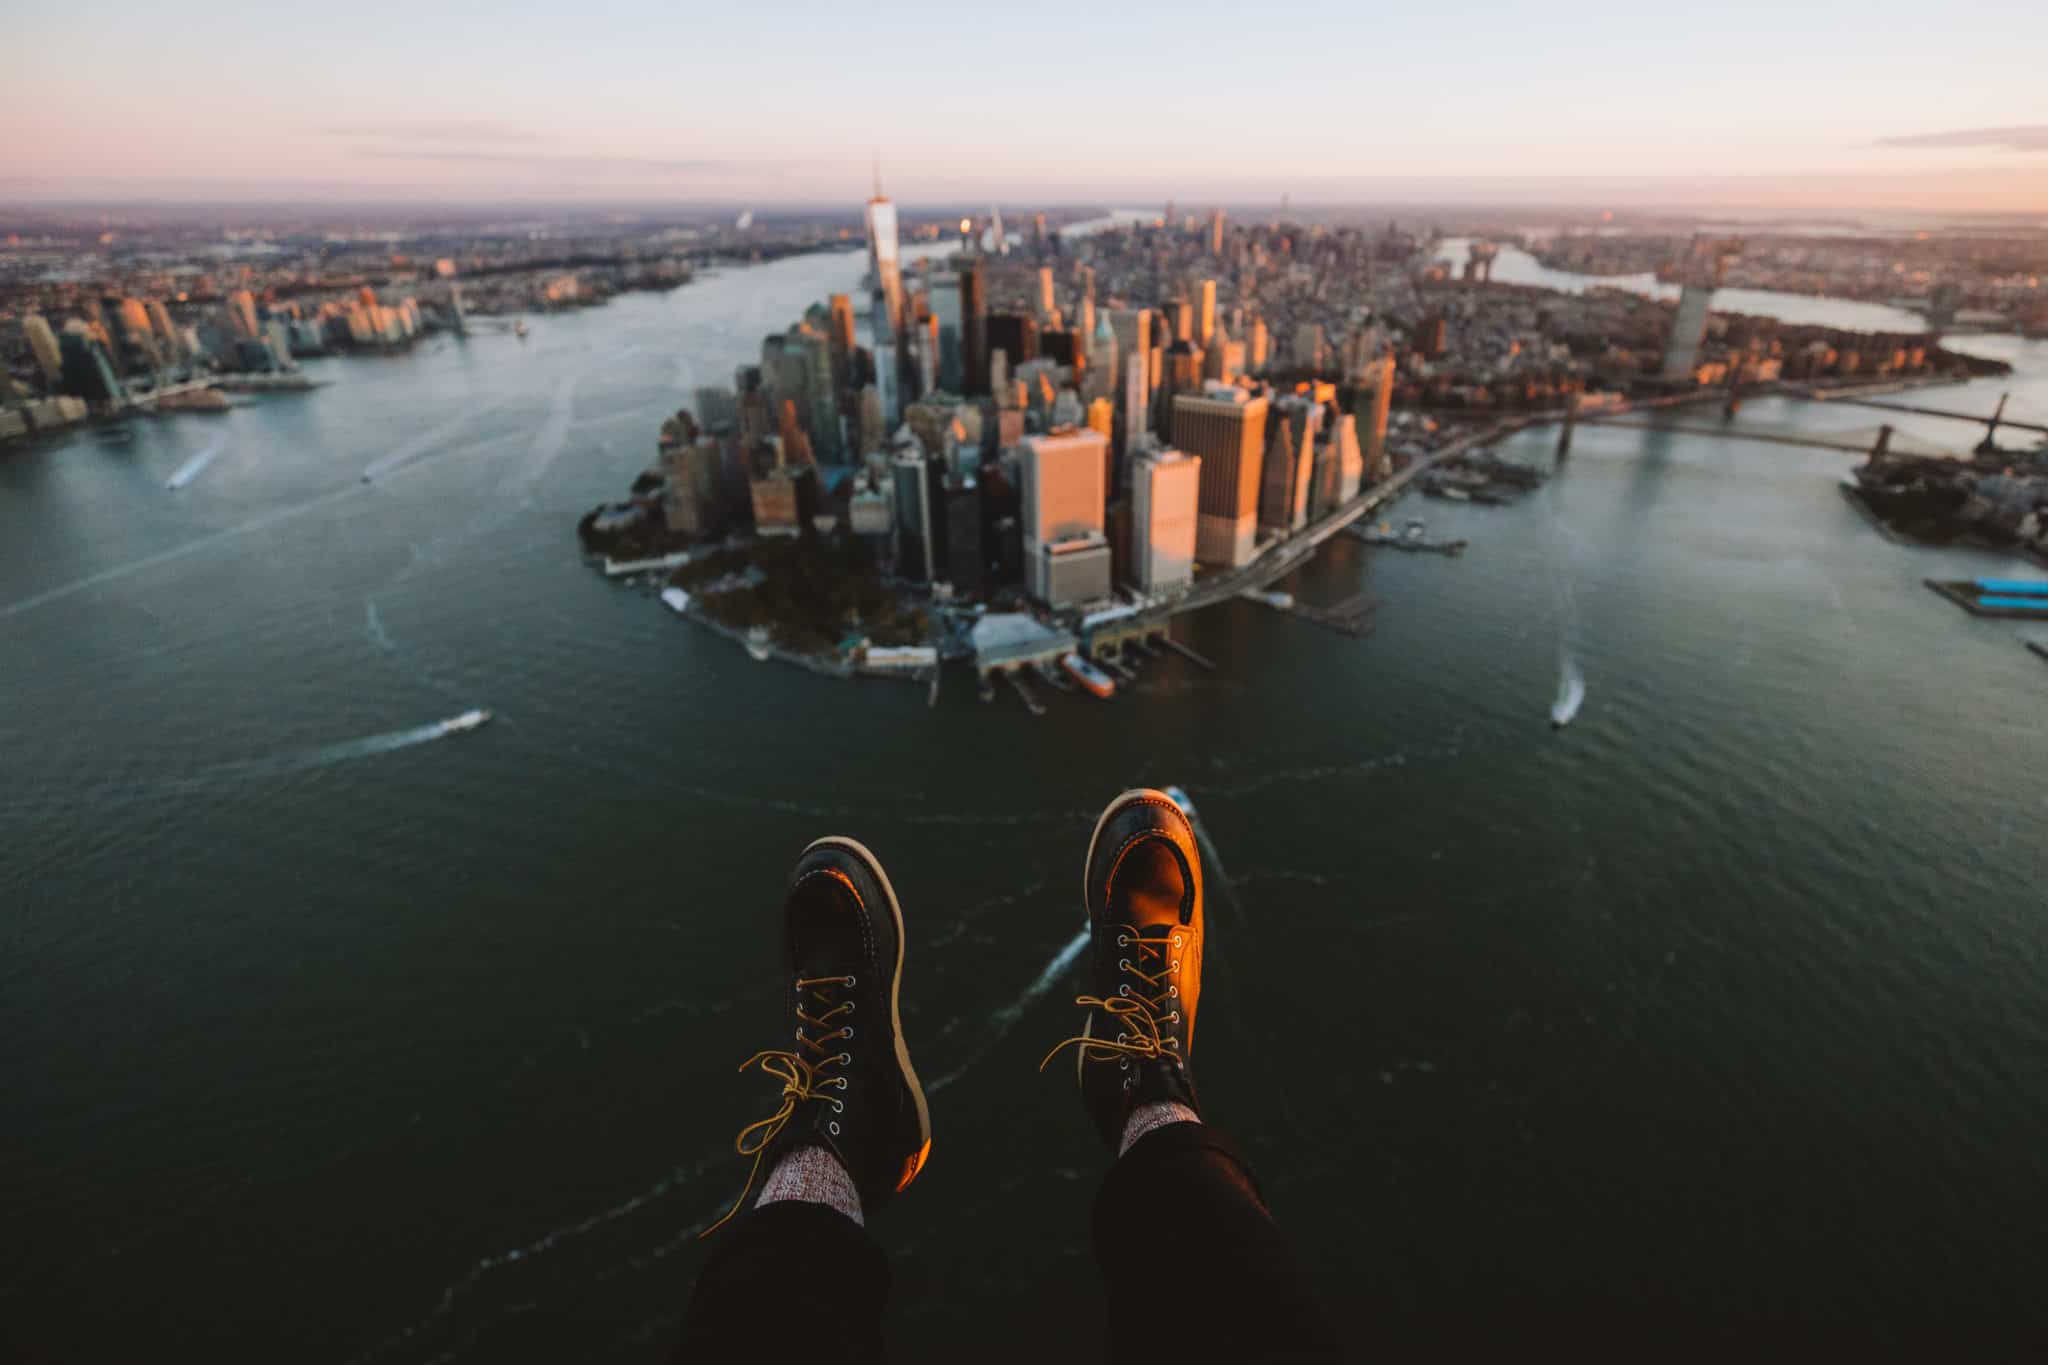
21. Dress for Warmth
As stated in Tip 9, it’s important to wear clothes that allow easy mobility and comfort on your flight. In winter, however, you need to consider extra layers to keep you comfortable in that chilly high-altitude air.
We recommend wearing a thermal layer (pants and top) beneath your basic set of clothes.
We also suggest wearing a double pair of socks and choosing shoes that will keep your feet warm. Finally, make sure to keep your neck and face warm with this fleece balaclava.
Pack some headwear, such as a beanie, but make sure it doesn’t have a pom pom on top—this could interfere with your aerial headset!
Did you learn something new from this post? What was your biggest takeaway? Sound off with your thoughts in the Comments section, below! We hope these aerial photography tips give you a little more confidence and knowledge for your next flight!


