
Post Summary: How To Make Your Own Backyard Fire Pit
If you’ve been following along with us on Instagram Stories, (we’re at @themandagies!) chances are you’ve seen us working in the backyard on our newest addition – a backyard fire pit!
We actually had big plans to re-do our deck, but recent events of the corona nature had us putting that on pause and searching for a smaller, more manageable project for the time being.
That’s when we landed on creating a backyard fire pit! We had a section of our yard that went generally unused, and we loved the idea of creating an outdoor living space where we could spend time outside with our friends on those warm summer nights.
If you are looking for an inexpensive project to do this season, we’re sharing our step by step guide to making your own backyard fire pit! Keep on reading for our suggestions, lessons learned, and some pretty cool before and after pictures.


How To Make Your Own Backyard Fire Pit
This post may contain affiliate links, in which we may earn a commission from a referenced purchase. This is of no extra charge to you. Thanks!


Where We Started
Our backyard didn’t start in bad shape, but we just didn’t use the space.
The previous homeowners had a grill out here, but we didn’t really have a use for this corner, so it went untouched the first year we owned the house.
Spending more time at home these past few months, we decided that it was important for us to have a backyard that had space to host parties, facilitate late-night chats, and love on our friends and family. That’s how we came up with a fire pit!
Some of our favorite PNW camping memories are late-night conversations around the campfire, so we decided to bring a little bit of that magic into our home – in the shape of a backyard fire pit!
Make Your Backyard Fire Pit Game Plan
The first task on your list of creating a backyard fire pit – make a list of things that are important to you.
Do you want room for lots of chairs? What does your ideal seating area look like? How about an in-ground fire pit or above ground fire pit? Once you have an idea of the elements that are important to you, it’s time to get drawing!
For us, we wanted a portable fire pit so that we could take it with us on camping trips. We also wanted it to be surrounded by plants and flowers, which is why we decided to create a flower bed around the perimeter. The sky is the limit when creating your backyard fire pit – it’s your space!

Draw Out a Sketch Of Your Fire Pit Plans
Don’t worry about exact measurements just yet. Go ahead and find some printer paper, and draw a rough sketch of your creation.
Berty and I made a lot of changes before we settled on a plan we were both comfortable with. Rough sketching saves you a lot of time and energy from changing things around often, or fussing about exact measurements.
Our Final Dimensions: 12 feet across (from garden box to garden box) x 13.5 feet from the top of the curve to back of the couch.
Check With Your City On Recreational Fire Regulations
One of the most important things you can do before you break ground is to check with your city about fire regulations.
It’s important to know your city’s restrictions on residential fire use so that you don’t get slapped with a hefty fine in the future. You can even call your city to get questions answered if that is easier for you!

Step By Step Guide To Our Backyard Fire Pit
Step 1: Clean Up And Measure Out Your Space
To start your backyard fit pit plans, you’ll need to know exactly where it’s going to be in your yard! Clean up any debris in your proposed area so you can see your workspace clearly.
For visual purposes, we placed sticks in a rough outline to help us decide how big it should be. We liked this way because we had the material on-hand, and it allowed us to move things around for quick changes.

After the rough measure, spend some time measuring the space officially. This way, you’ll know how much material you will need in the following steps.
Step 2: Manual Labor + Leveling The Space
After the measurements, we got to work removing the old red pavers, red mulch, and cutting into the sod in our backyard. We still used our pieces of wood and sticks as a guide, but you could get fancy and use landscape spray too.
This took a lot of effort, and both Berty and I were exhausted at the end of these days!


Step 3: Install The Landscape Border + Weed Fabric
After we cleared and leveled the space, we dug a trench around the outline to lay out the landscape edging. We wanted it to be secure, and a bit above ground level so it could be used to hold the gravel in place on the inside.

Once the border was securely in the ground, we rolled out the landscape fabric.
We laid this out so that the gravel wouldn’t mix with the dirt underneath, to keep it cleaner, and make it easier to take out if we needed to do so in the future. We secured the landscape fabric in place with landscape pins, to keep everything neat and together.

Step 4: Adding Gravel + Stepping Stones
When the border and weed fabric were installed, it was time to add the gravel. We opted for pea gravel, as it was smaller than bulky river rock, and easier to walk on. We also chose pea gravel over regular gravel, because it was softer on bare feet, with less risk of sharp stones!
However, we’ve been told that regular gravel settles into itself better than pea gravel, gradually closing gaps for a more secure fit. The type you use is completely up to you and your preferences! (Just a note though, river rock may be too big for a DIY fire pit project like this – it makes it hard to keep things on a level surface!)

We purchased bagged gravel, and spent two days unloading them in the backyard from our car. Our first trip we ordered 20 bags, which was half of what we actually needed! We had to make a return trip to the store, and ended up purchasing 40 bags in total. Even then, we’ll probably buy five more bags in the future, to fill in some low spots.
To keep the fire pit on a level surface, we chose three stepping stones, and added them on the weed fabric before we filled it in with the gravel. This gave our portable fire pit a solid surface for the legs to stand on.


Step 5: Clearing Space For Flower Beds + Adding Stepping Stones
After the gravel was in place, we measured out two feet around the perimeter of the fire pit, and began removing sod for flower beds. We’re not sure what we’ll plant here, but this season, we’ll try out some sunflowers and hollyhocks, because we have those on-hand right now!
We also decided to add stepping stones from the stairs to the fire pit, to prevent the grass from dying underneath the predicted traffic to and from. We cut out a section of sod so that the stepping stone could fit into the hole, and the grass could slowly grow in around it.


Step 6: Building Garden Boxes + Adding Soil
After the space was cleared for the flower beds, we reused the old red pavers to create a platform for garden boxes on either side of the fire pit.
Unfortunately, we didn’t capture any pictures of that, but you can see in the photo below a finished garden box, that’s supported on top of the reused red pavers.
For the garden boxes/raised beds, we opted to use cedar wood because we loved the color and the longevity of the wood. However, you can use pretty much any kind of wood that’s not chemically treated, which can save you a ton of money on a project like this!

Step 7: Planting Flowers + Shrubs
Once the boxes were made, we ordered plants and began to beautify the space with some greenery! We chose bright pink azaleas to be planted permanently in the flower bed border and staged the rest of the area with boxwood, just for this shoot! (We gave them a permanent home afterward as a future border hedge)
This year, we’re planning to plant some sunflowers and hollyhocks in the open beds, as we already have those seeds!


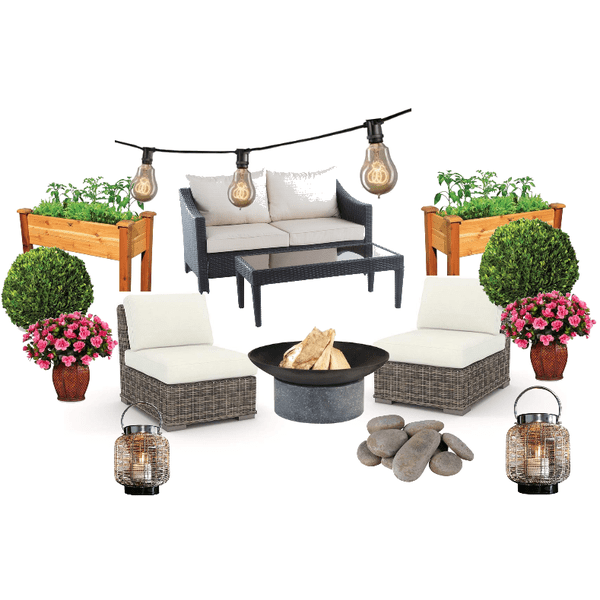
Step 8: Enjoying The Fruits Of Your Labor!
To celebrate our new fire pit, we had a backyard campout! It was fun for us to test out different aspects of the backyard fire pit before we formally had any guests over. We also found it was a good time to test out the distance from the fire to our furniture and discover if we liked the seating arrangements.
It was also a beautiful day to have dinner by the fire, and roast some s’mores too!

Lessons Learned
Every project comes with reflection and lessons learned. We would do a few things differently, and we’re sharing them here with you now. This way, we can hopefully save you some time and energy when building your own easy DIY fire pit.
We would buy gravel in bulk. Loading 40 bags of pea gravel (with two trips to Home Depot) in and out of the car, and to the backyard was super hard. Those bags weighed nearly 50-lbs each, and it was exhausting work! If we could do it over again, we’d arrange for delivery of gravel, or borrow a trailer to do the gravel in one single trip.

We’d spend more time leveling. As we were laying down weed fabric, we noticed that the area still has a slight slope. It wasn’t a huge deal for us because we just added extra gravel in the end to level it. However, if you were going for a permanent solution like concrete, we suggest you spend more time making it level.
We would tuck the weed fabric under the landscape edging. Instead of cutting it to size, we ultimately tucked it in on itself and added gravel over top. If we did it again, we’d cut the fabric to size. This way, we could tuck it under the landscape edging for a clear line and a more precise fit.

How Much Did Our DIY Fire Pit Cost?
Making our own backyard fire pit was actually very low-budget for us. Mainly because we had most of the materials for the project already!
Considering we’ve been saving up all year to replace our deck, we had the funds to shift to this smaller project. For us, this was a good decision so that we could keep more money on hand, and still have something to work on in the springtime!


Our Total Expenses: $531.95
Things We Bought:
- Pea Gravel – $200
- Portable Fire Pit (from Barebones) -$125
- Cedar Wood Planks (for planter boxes) – $197
- Landscape Pins – $9.98
Things We Already Owned:
Some alternatives for cutting costs when building a backyard fire pit:
- Using common board instead of cedar or redwood for garden boxes ($150+ savings)
- Cheaper portable fire pit (Like this one form REI) and less-expensive outdoor furniture. ($500+ savings), OR making an in-ground stone fire wall with inexpensive stones.
- Opting out of landscape edging/weed fabric and just removing sod ($100 savings)
- Purchasing bulk gravel (or looking on local Facebook groups of Craigslist for free loads!) ($200+ savings)
With resourcefulness, you could do this for probably even cheaper than how we built it!

Thanks For Following Along!
If you’ve read this far, we just wanted to say thank you for sticking with us during this time! It’s a little weird not to be traveling, but we still love sharing our lives (and our DIY projects!). It’s been fun to rediscover this part of our lives!
We hope that these at-home posts can inspire you to love your space as well, and discover a new place to rest your mind and body. We love you guys!
MORE PROJECTS TO DO AT HOME
How To Make Your Own Travel Gallery Wall
The Ultimate Backyard Camping Set Up! (Inside AND Outside!)

Beautiful job on your Peace garden/ ???? pit. A place you call HOME. Nothing better to watch the flames dancing at nite away with loved ones and smores.
Thank you so much Greg! I really appreciate it, and we couldn’t agree more! S’mores and friends are the perfect way to celebrate. We can’t wait to have people over in the future!
This looks awesome!
Thank you so much Jeffrey!! I’m super glad you like our fire pit!